How to Sell Online Without SSN? No SSN, No Problem!
As a minor or a temporary resident, it could be difficult to sell online without a Social Security N ...
Product photos require precise image capturing and post-processing. Before post-processing, your product photos need to be shot perfectly otherwise image editing won’t make any difference.
The background of a product photo needs to be solid white according to most of the product photo requirements of online platforms. That’s where a softbox comes in to play a vital role in product photography.
You can find different types of softboxes in the market in different sizes but these are expensive in the sense that you can make one of this on your own. Unless you shoot large products, make your own DIY softbox for medium and small product photography.
Follow this article till the end and you will know how to make a softbox for product photography using simple materials in 2020.
You can make a product photography box using materials that you may find in your storeroom. So if you have budget restrictions then this DIY softbox tutorial is for you. You don’t have to know any rocket science to make DIY lightbox photography. Let’s know what materials you need to make a product photography box
Materials:
The materials listed above are simple and easy to get. You might find some of them in your basement or storeroom. Now after managing the materials we will start the making process.
Procedure:
1. Take the box, create small windows on three sides by measuring and drawing lines. These windows will allow passing through the lights from all over the area. Use the measurement scale and draw the lines evenly.
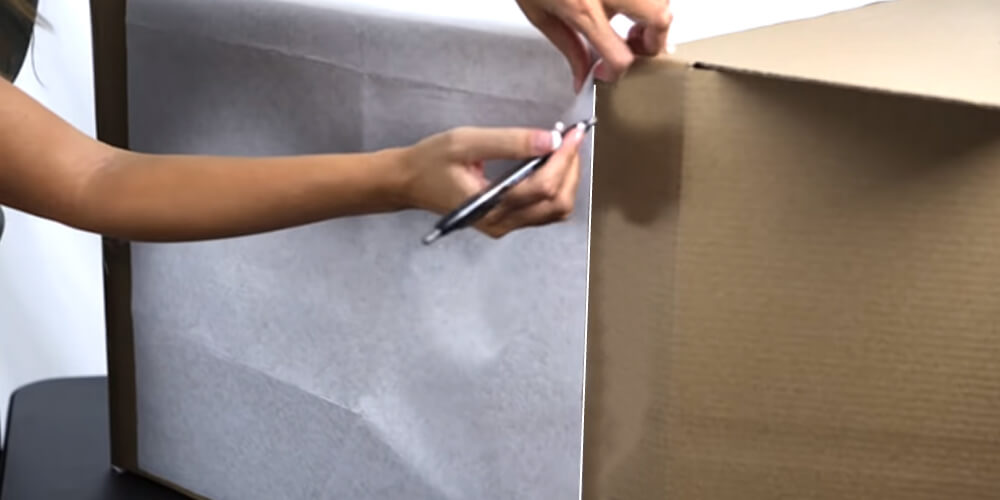
2. After drawing the lines now we will cut through the lines and create the windows. Try to cut accurately from all the sides so that you get evenly cut windows
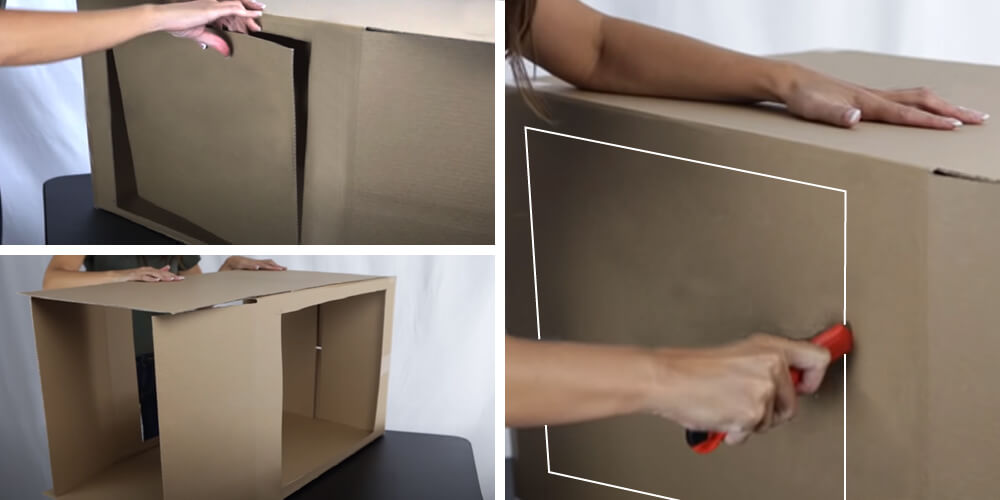
Tape the one side of the box and open the other one so that you can shoot through it by placing your camera.
3. Now it’s time to attach the white paper to create the white background and also the surroundings. The reason we are using the white paper is according to the online platforms the product image that you want to list on them needs to be in a white background.
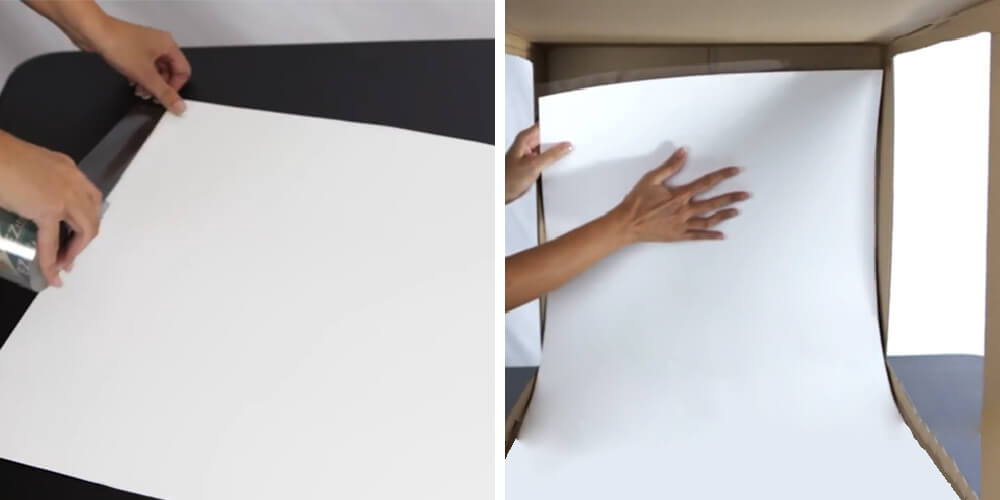
We will use white paper in two ways for two different reasons. One is to create a white background which will allow us to capture professional product photos and another one is to control the photography lighting.
To create a white backdrop, tape the white paper from the bottom of the box. Rolled it and fit the paper inside part of the box.
4. Now that we got our solid white background product image, we will roll our box with white paper around the three windows that we made.
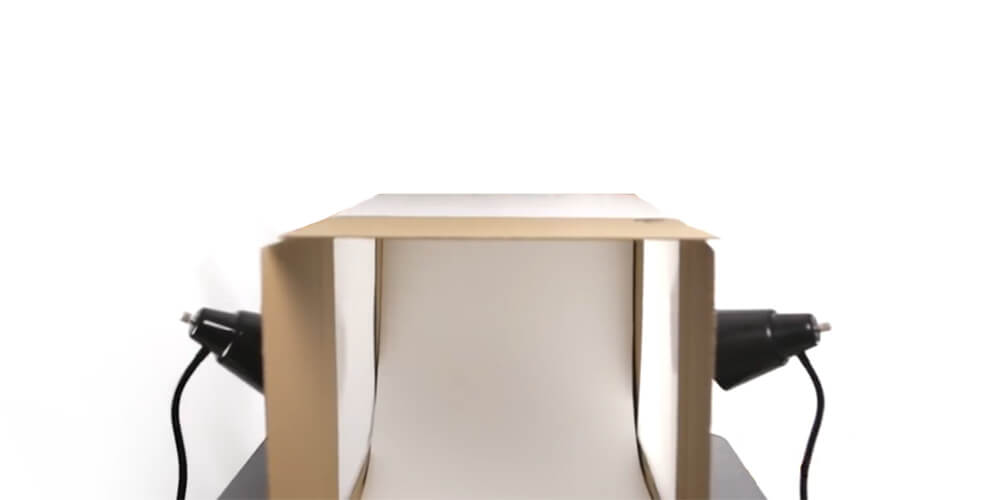
So what we get is a box fully covered with white paper and one side open to place the product inside it and shoot. Our DIY lightbox is complete and ready for the shoot. You may think about the photography lighting setup as we didn’t mention it above.
Lighting in photography is like water in the ocean. You can’t think an ocean without water the same is the lighting in photography. The softbox we made is usable for both natural light and artificial light.
If you want to use natural lighting just place our portable softbox in the outdoor or near the window where natural light can fall upon the box easily. All you need to maintain is that the light that falls upon the box is even from every side of your product image will get uneven lighting through the entire product.
Or if you want to use artificial lighting just use table lamps from the three sides where we made three windows and the entire product will get even lighting.
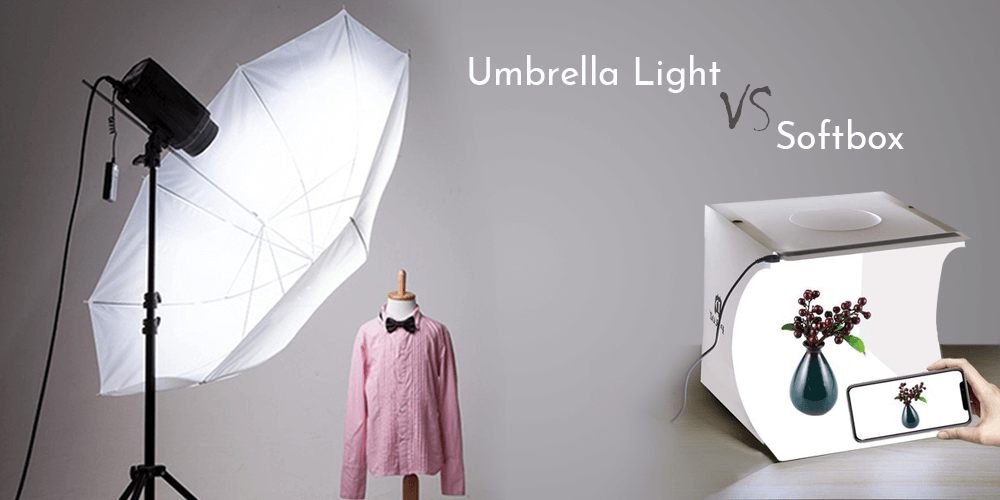
Well when we are talking about the photography lighting setup, umbrella lighting for photography ought to come. As lighting is the backbone of photography and in this article, we have already demonstrated how to make a softbox/soft lightbox for product photography, it is destined to do a comparison between umbrella photography lighting setup and the softbox for product photography setup.
Umbrella photography lighting is what the name suggests, it is using umbrellas one the light source to make the lights soft. Direct lighting is a bit harsh and creates high contrast on the subject in photography. Umbrella reduces the harshness and spreads the lights evenly all over the room and so the subject. This creates natural-looking lighting with a softer shadow and makes more eye-pleasing.
So you can make and use a softbox which is portable, budget-friendly but on the other hand, you can purchase an umbrella lighting setup for product photography which is easy to use. So which one is the best? Let’s break it down and know the advantages of these to product photography lighting setup.
Umbrella lighting for photography lets you get a nice soft glow on your products and produce almost natural light throughout the subject. With this, you can use direct lighting towards the product without any fear of getting overexposed product image. The benefits of using an umbrella lighting setup are listed below:
Softbox is basically a complete setup for product photography. It doesn’t only cover the lighting but also provides a solution for product photo background as well. Professional softbox for product photography is relatively expensive. That’s why we have described a method using which you will be able to make one for yourself. The benefits of using a soft lightbox for product photography are:
Umbrella vs softbox, which one is the best? Or which one you should use? Well, the choice is yours, and it’s up to your requirement which one you should use and which one not.
Umbrella lighting is a lighting setup that you can use indoor or outdoor to soften the lights. Softbox can be a complete product photography setup if you choose wisely enough.
If you are working with small or medium-sized products then a softbox is what you need but if you work with the larger product then you can use umbrella photography lighting for your product photoshoot.
What equipment is needed for product photography?
For product photography, you will need a few basic things only related to product shoot. Whether you are a beginner or an expert in product photography these things must need to be in your photography setup collection.
What are the different types of product photography?
Product photography is not always the same for the entire product category. It differs depending on the products and the method of presentation. Few common product photography types are
Should I invest in professional product photography?
Without impressive product photos you can’t grab the attention of your targeted consumers. Only a well written product description is not enough as people believe what they see. As a businessman I assume you also want to sell your product and make profit. If this is true then professional product photography is a must and you should invest in it.
How to Create Professional Product Photos with Just One Softbox?
In this article we have created a diy softbox for product photography. Using our method you can create your own. In a softbox you can use both natural light and artificial light to capture professional photos, all you need to keep your product center of the soft lightbox and provide the lightning to shoot. Place your order in the middle of the box and adjust the frames. Now shoot the product image with white background for online stores.