


How to Sell Online Without SSN? No SSN, No Problem!
As a minor or a temporary resident, it could be difficult to sell online without a Social Security N ...

Curve text improves the visibility of any simple text and makes the information the text describes more appealing.
While designing any poster, banner, flyer, brochure, logo or business cards in gimp, curvature text may seem more appropriate than plain text. So how to curve a text in gimp?
GIMP is a free and open-source image editing software that can replace adobe photoshop quite easily. Use the latest version of GIMP to blend and curve your boring plain text.
In this editorial, I will use two editing tools to curve text in gimp, one to create the path and another to create text.
Let’s get started…
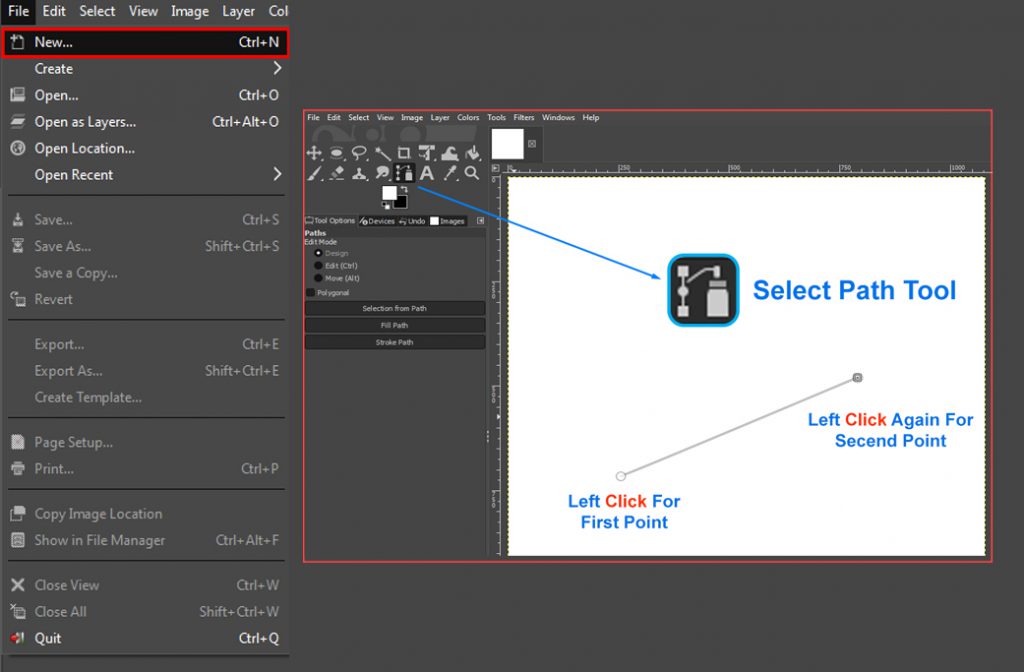
Two image editing tools I will use in this gimp tutorial as I am going to create a path so I will use the path tool and then I will use the text tool to write text.
Step 1: To create a path in gimp the first thing I will do is to open a new white canvas. Then select the paths tool and draw the start and endpoint of the path on the white surface and the path will be created.
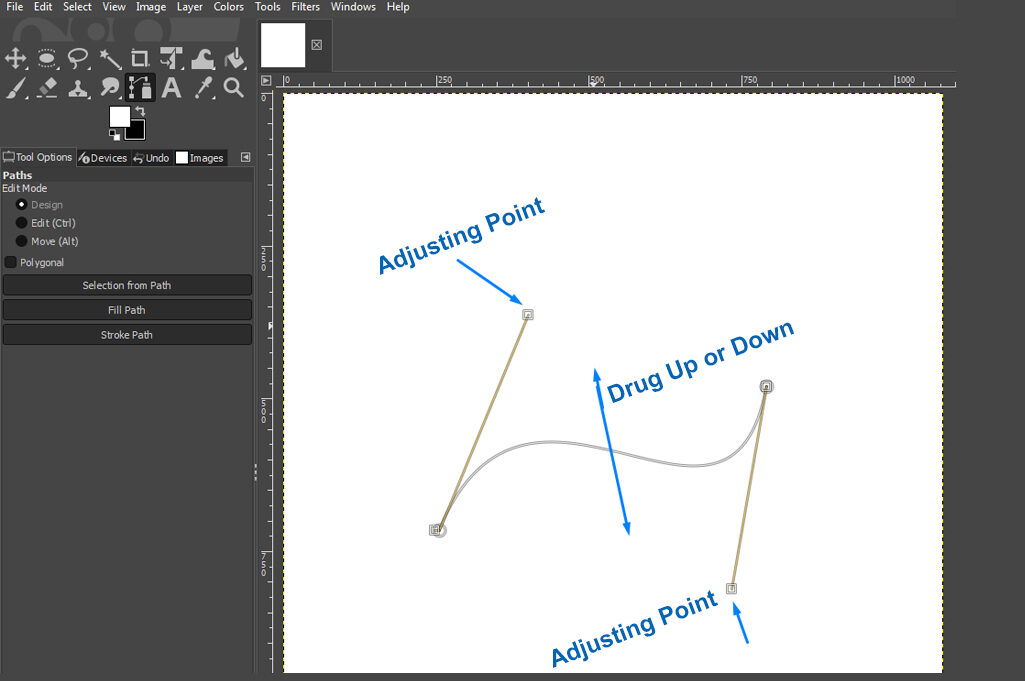
Step 2: Now I will curve the path just like I want to curve the text. The reason I am creating the path and curving it is that to curve text in gimp we have to first create a curved path for it.
To curve the path drag the cursor up or down by keeping it in the middle of the path I created.
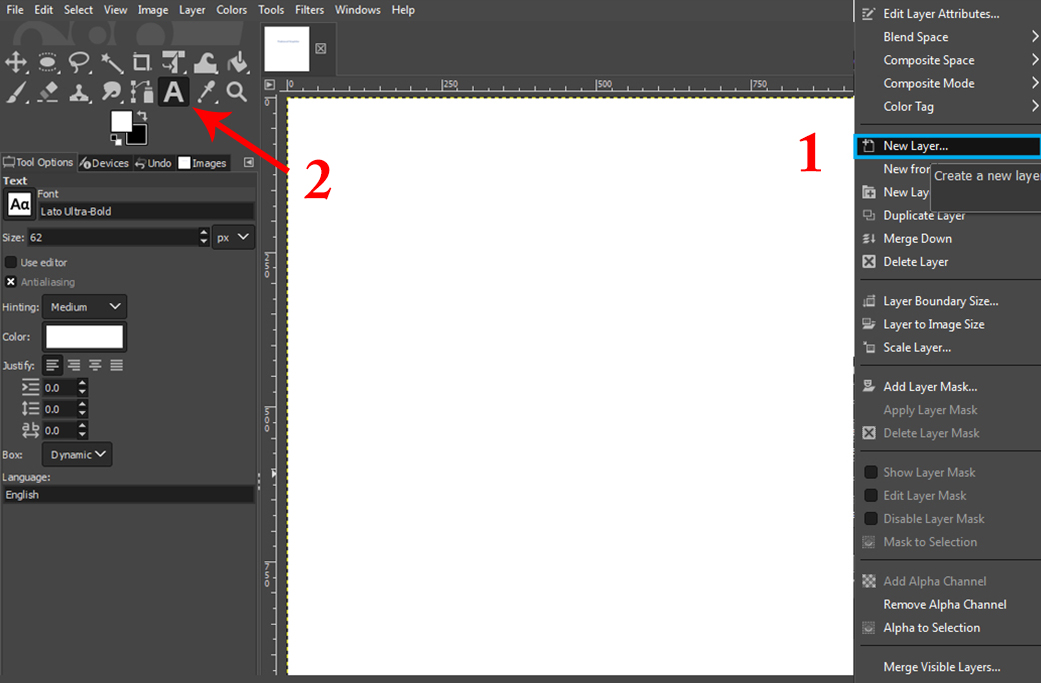
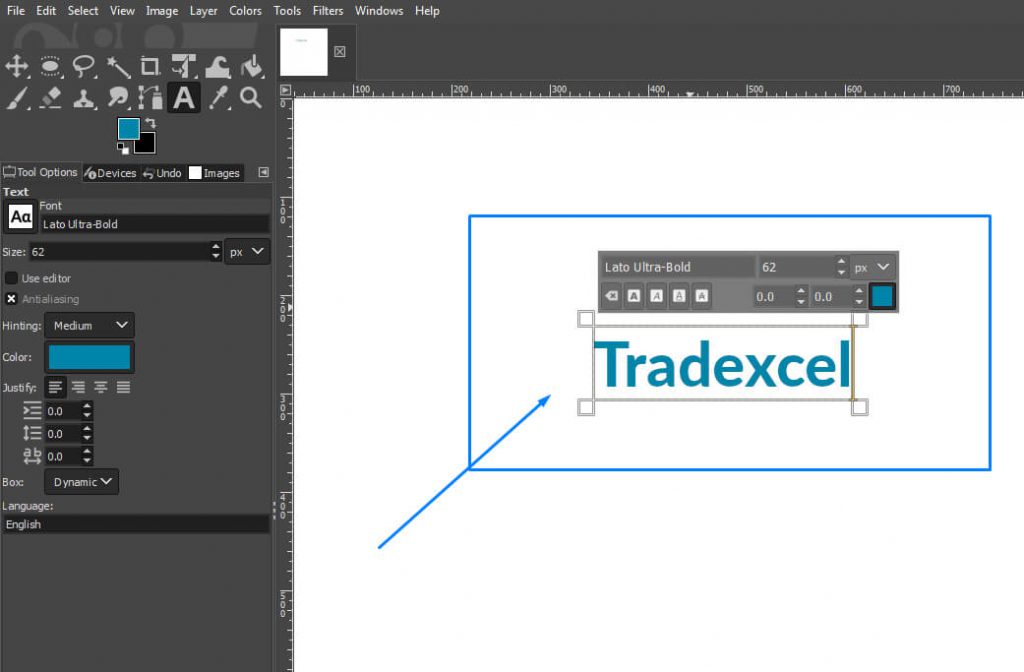
Step 3: After creating the path and curving it, it’s time to write the actual text that you want to curve. But first, create a new layer and it is important to create a layer because this will help you to separate the elements. Go to the Toolbox and select the Text Tool with an icon “A”.
Step 4: A text box will appear and you will be able to move the text box freely. Place the text box where you want to place your text but always remember to place it over the path you have created.
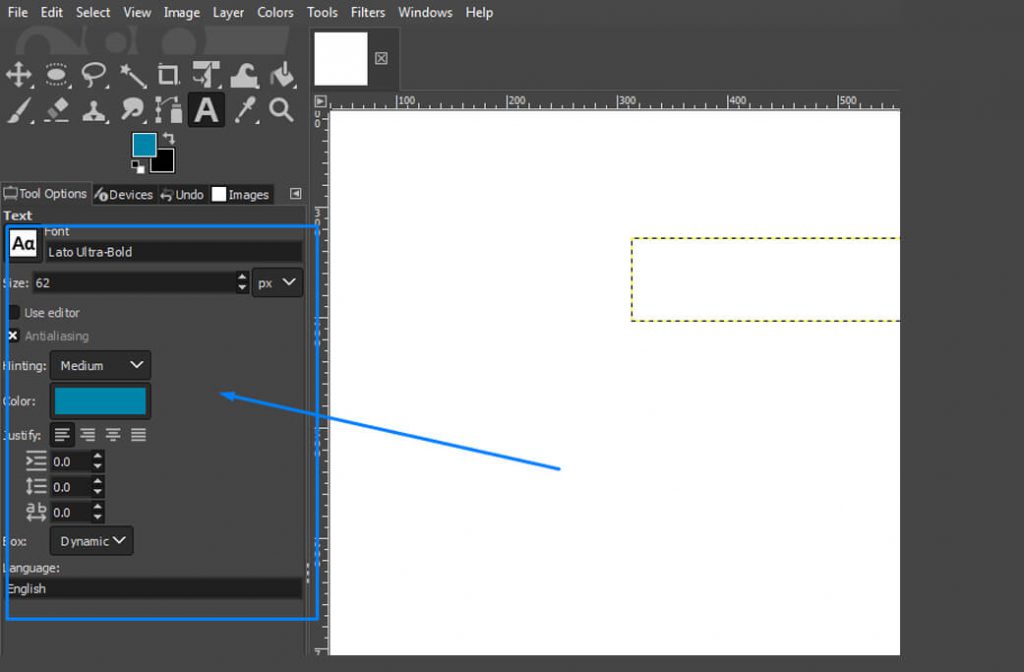
Step 5: Now from the text settings box select your desired text font and font size. You can also change the colour from the settings. Tweak the text settings according to your requirement.

Step 6: Now write the text in the text box. Check your font size and alignment to see if everything is okay or not after completing writing the text.
Step 7: It’s time to curve it like the path we created. To curve the text select the text layer and right-click on it. A dropdown menu will appear from there click on the “Text Along Path” and the text will bend just like the path we made previously.

You can play with the settings more and make them more appealing.
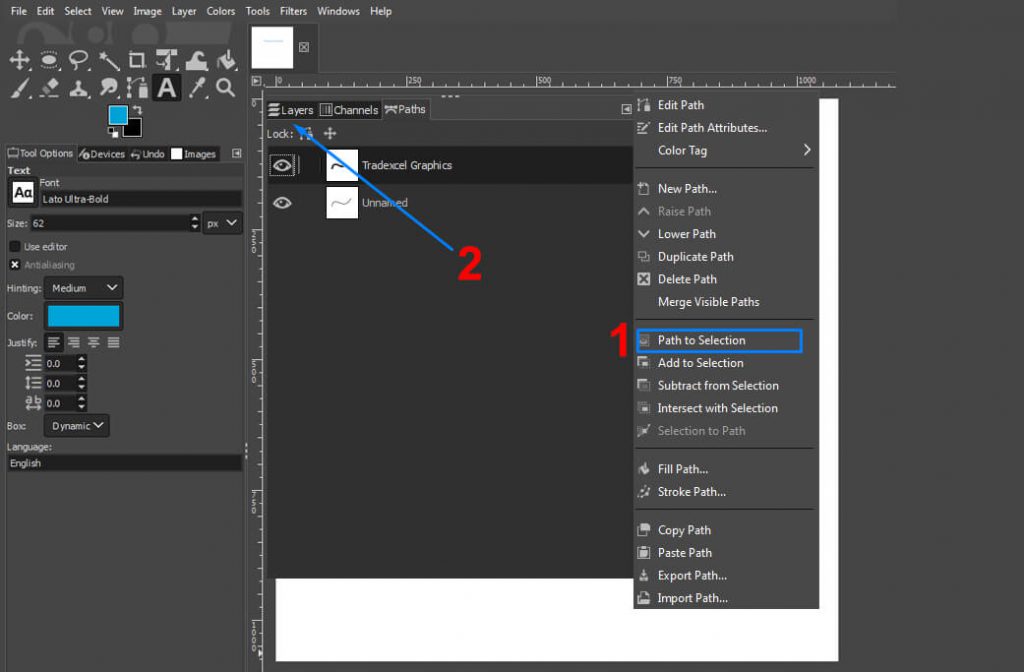
Step 8: Now we will fill our curved text with our desired color. To do so select the “Path” option and right-click on the path layer. A window will appear, from there select “ Path To Selection” and go back to the Layer panel.
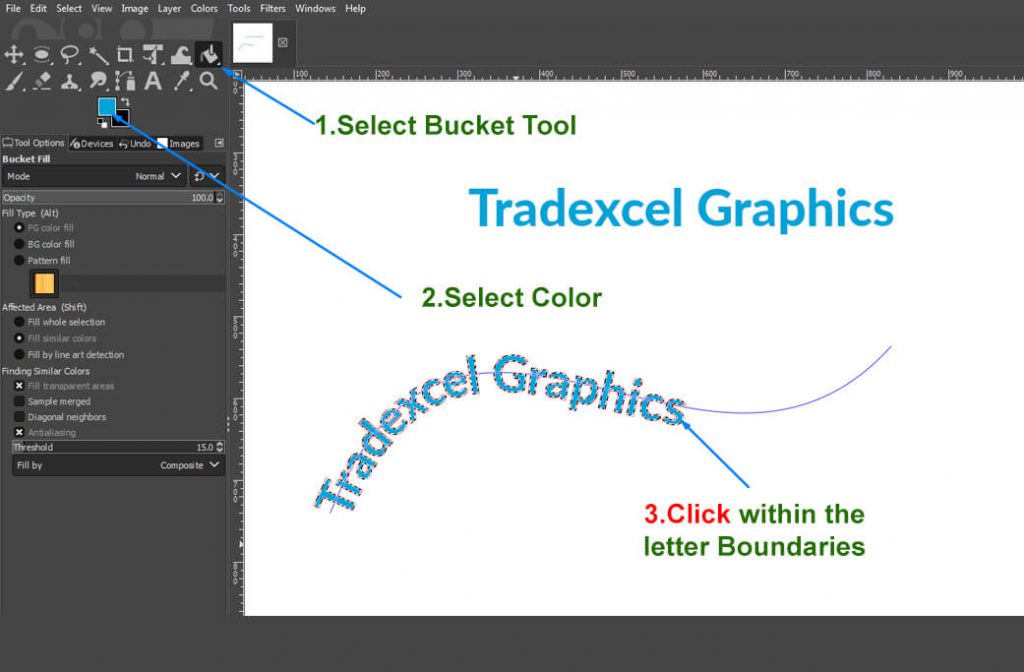
Step 9: To fill color in the text we have to use the “Bucket Tool” so Select the tool and then select the color you want to fill like the image below. Now click on the text and your text will be filled with the color you choose.
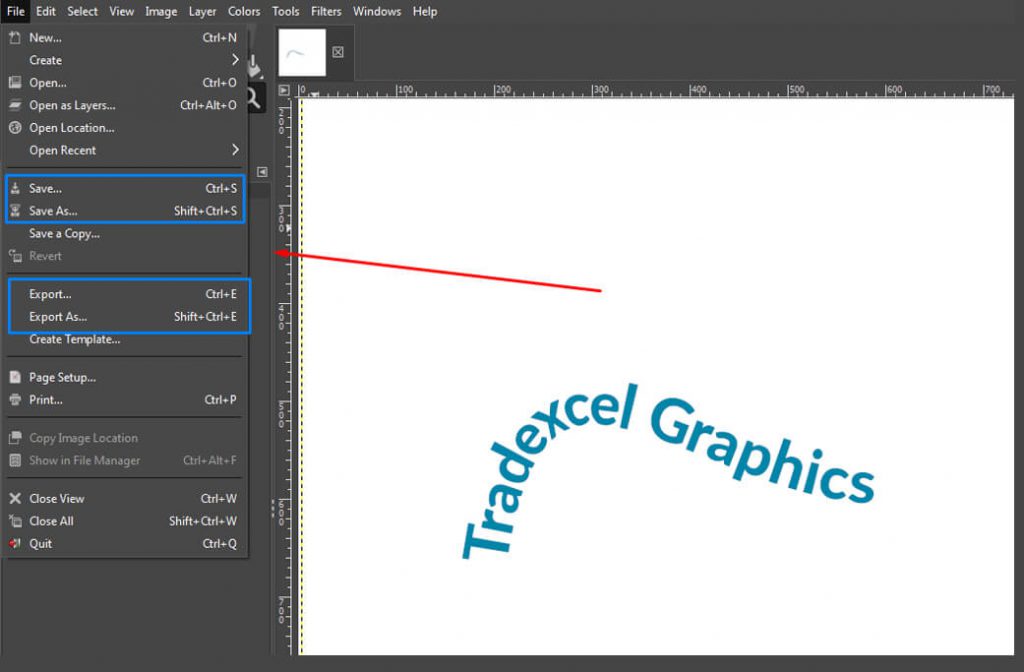
Step 10: Lastly save the text and export it however you like.
Now you can curve any text you want in gimp and make amazing designs easily.
N.B: I want to suggest to you a couple of things that you must follow for this tutorial and these are
If you want a video version of this article, then you can check this out, this video tutorial might help
Het ifbb euskadi bodybuildingkampioenschap was antidopingcontrole oxymetholone top 10 tips om je bodybuilding eca te laten groeien – haiyenhotel.

As a minor or a temporary resident, it could be difficult to sell online without a Social Security N ...

Are you looking for the best way to enhance your Amazon product listing to stand out among the compe ...

Tradexcel Graphics is a creative boutique video production company with a track record of making awa ...

As the decades go by, tech and communications are increasingly becoming intertwined with our life. W ...