


How to take Product Photos like a Pro
While taking product photos one question that all of us have is, “will my product photo look impre ...
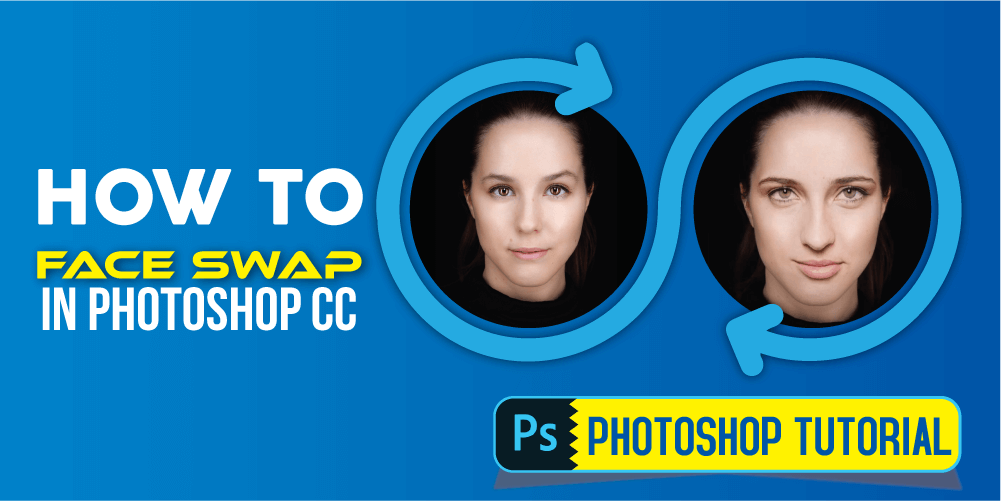
This is an ultimate guide to swapping faces in Photoshop CC for your greater interest. Learn how to replace a face in photoshop and how to blend faces in photoshop from this tutorial taught by TradeXcel Graphics.
The following topics encompass this article.
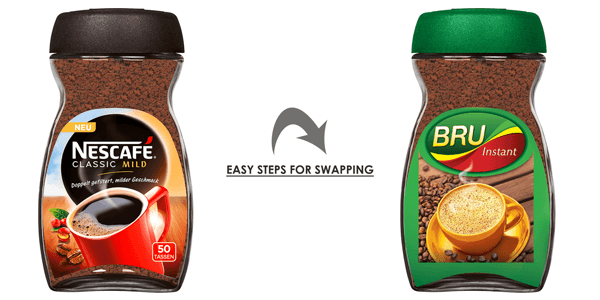
Photoshop face swap is a common technique used for swapping humans or any faces formed by image editing. This technique is a perfect fit for eCommerce Product Photo editing exclusively to use the best advantage for investing in Product Photography for eCommerce business.
An interesting image-editing process is the Photoshop face swap. It allows you to swap faces as per your liking. You can use the faces of different people and do the trick using Photoshop.
This swap face in Photoshop technique is particularly useful for e-commerce stores. The reason for this is that they want to make the most of their investments in eCommerce product photography.
Why do you want to do a Photoshop face swap? Well, there are not one or two reasons that you might want it for, including:
Sharing images have become a norm on social networking platforms these days. People share different digitally swapped 2 faces in 1 picture mainly for a fun effect.
The popular growing trend of taking selfies lead to the emanation of the best face swap software for PC, or Photoshop face swap apps (face swap in Snapchat) embedded in mobile phones, for example, iPhones and Android devices.
These applications are developed in such a way that they can track and detect faces instantly. They are so brilliantly programmed that they can also categorize images by looks, and are even used for verification by the face of an individual ID.
Other than all the things stated above, Photoshop swapping faces have some prospective uses like:

Find the face swap technique interesting? TradeXcel Graphics’ is competent enough to do exactly the same for you.
We’ll do a Photoshop face swap for your product photos.
In this face swap tutorial, we’re using Adobe CC 2019 Master Collection. Among the popular Photoshop tools, we’re going to use the Photoshop Lasso Tool to cut the desired portion for face swapping. Steps may vary based on the versions.
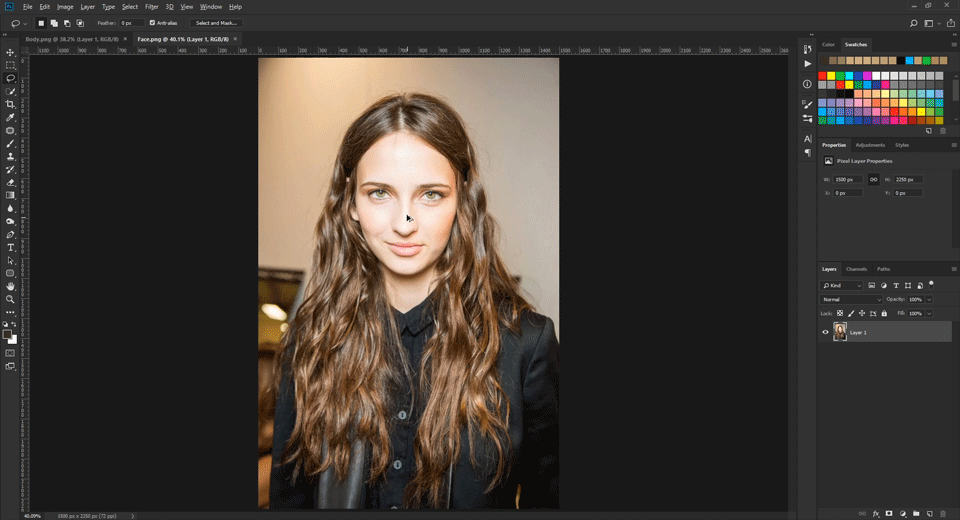
To do that, you need two faces of two different people. It’s not necessarily important to be of the same gender.
Instead of using the Lasso Tool, you can also use the Polygonal Lasso Tool if you don’t find it. For that, you need to hold on to this tool icon after clicking on it.
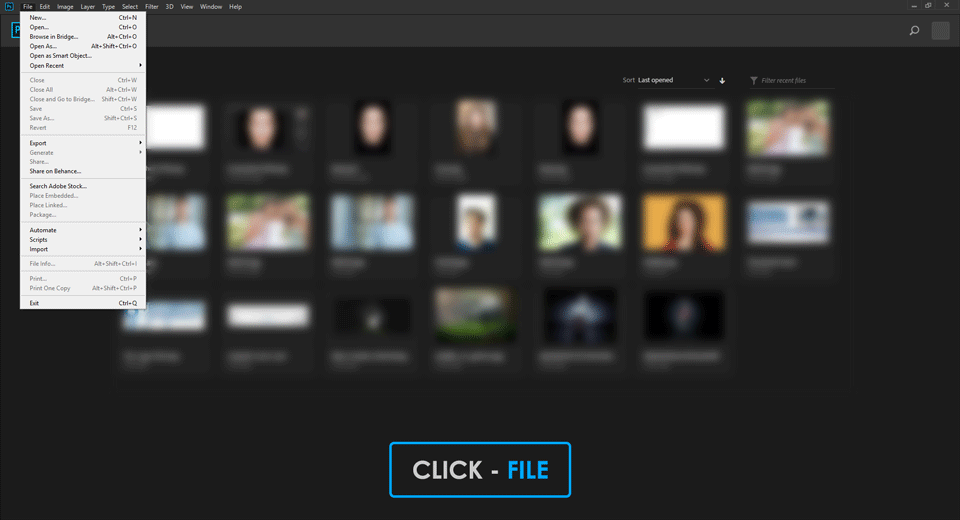
To Open Two Images in Photoshop

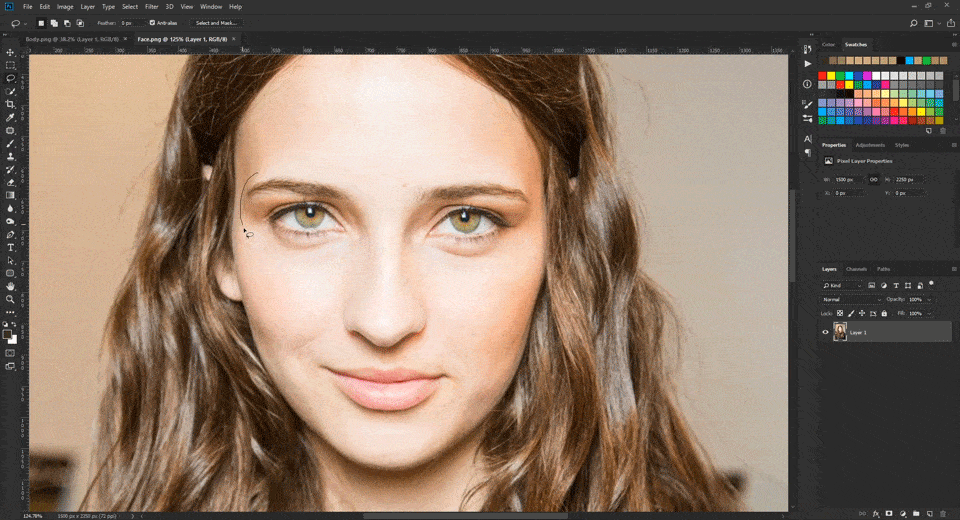
Find the Lasso Tool on the top-left toolbar and click on the icon on the tool menu. Alternatively, press “L” to select the Lasso Tool.
Carefully start tracing around the facial features like eyes, eyebrows, nose, and lips.
Select the area of the face on which the most portion is highlighted, and ensure the end of drawing the clipping path meets recede to the starting point.
When you’ve finished outlining, a flashing dotted line will be highlighted around it.
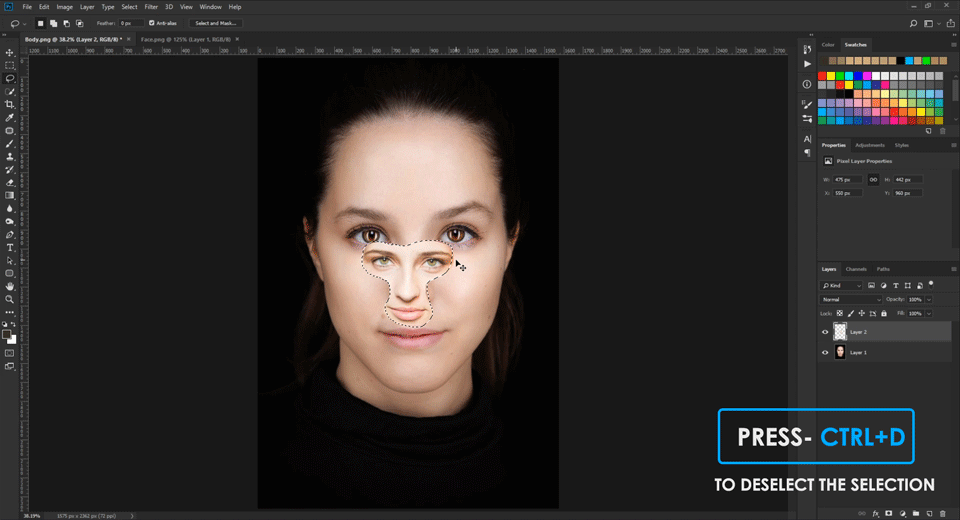
Copy the selected portion that you want to swap faces on the desired image. And then, paste it. Follow these steps:

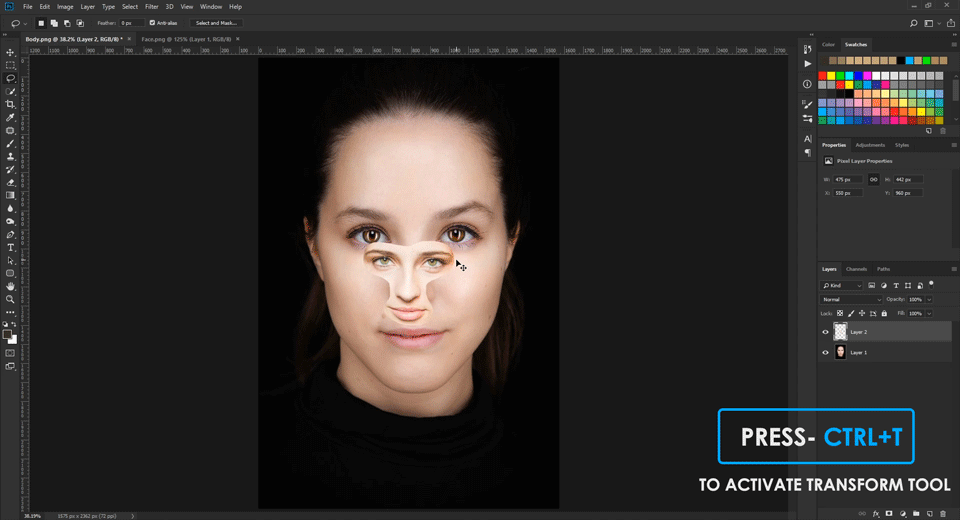
When you’re done with copying and pasting the face area, deselect the portion of the image and take the flashing dotted line away. For that hold down Ctrl + D on Windows or CMD + D on Mac.
Hold down Ctrl + T or CMD+ T when you select Layer 1, alter the size of your processing image by dragging the corners of the box
If you want a better view of your final image, you need to scale down the opacity. This amount of reduction for the copied portion helps match different face parts such as eyes, nose, etc.
Reduce opacity according to your need by dragging the slider arrow to the left. To do image resizing:

Under Free Transform Mode, it will allow you to manipulate the face layer further. Follow these:
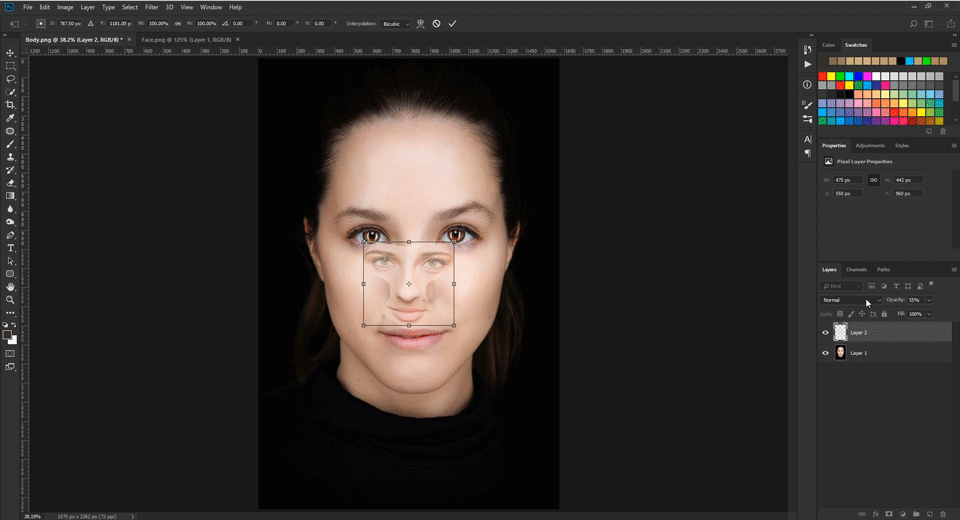
Set up both face layers to swap perfectly. After the fair adjustment of the face, drag if after clicking the box.
If you need to grow the image or shrink it, just drag the corners. Again, drag by sides to stretch the image or squeeze it.
Hovering the mouse outside the corners will give you rotation commands to rotate the image.

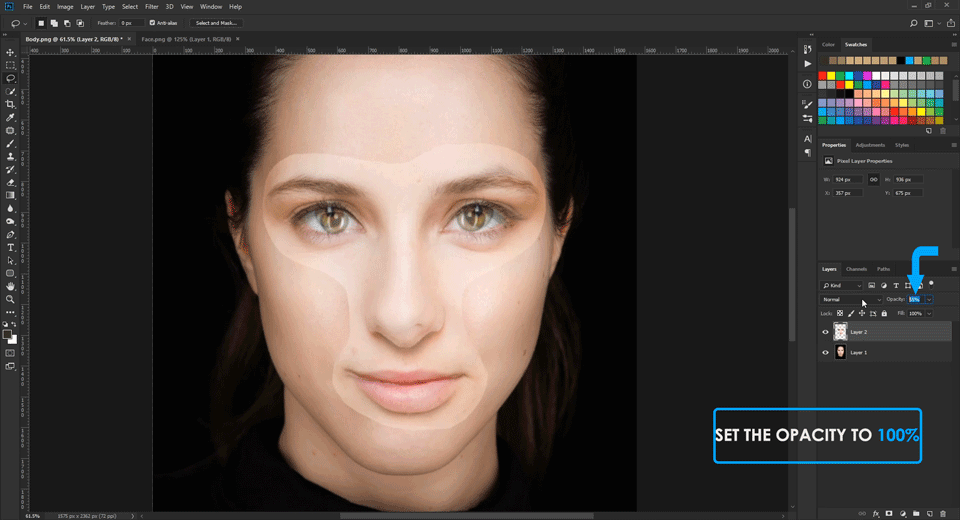
After setting up of the two faces, back the opacity to 100%. When swapping for the new face, ensure one thing that the imported face fits perfectly. To do that:
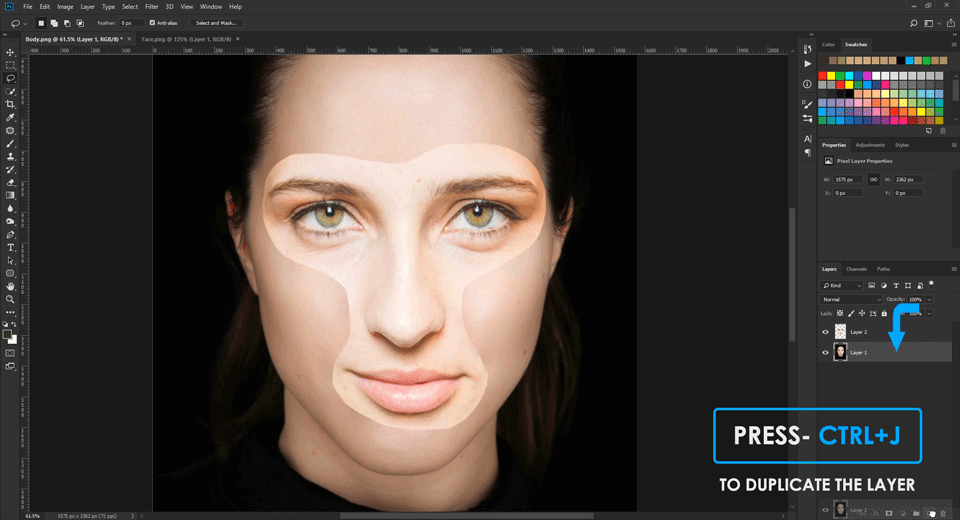
Now, you need to copy the background layer
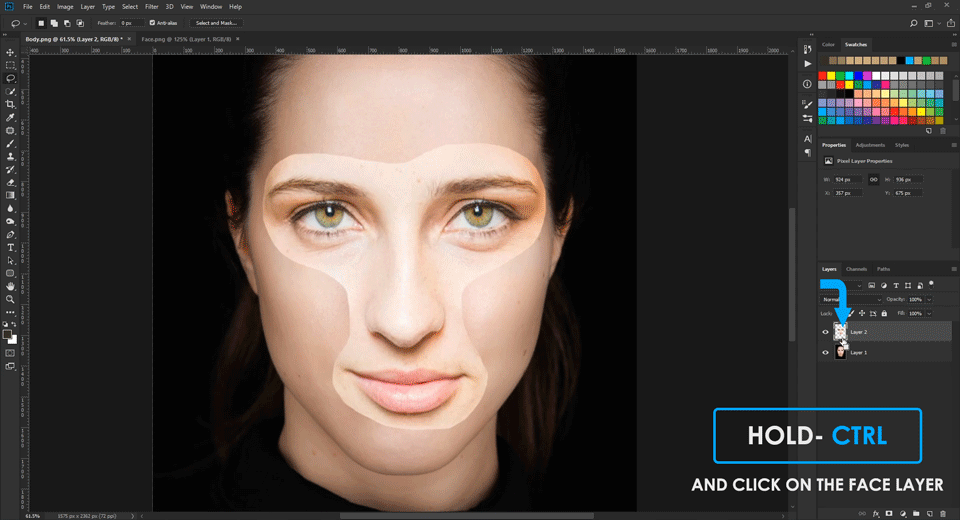
Resize the selection to fit in the new face
Now hide Layer1 and the background by pressing the eye icon of the Layer1. Click on the swapped face and delete.
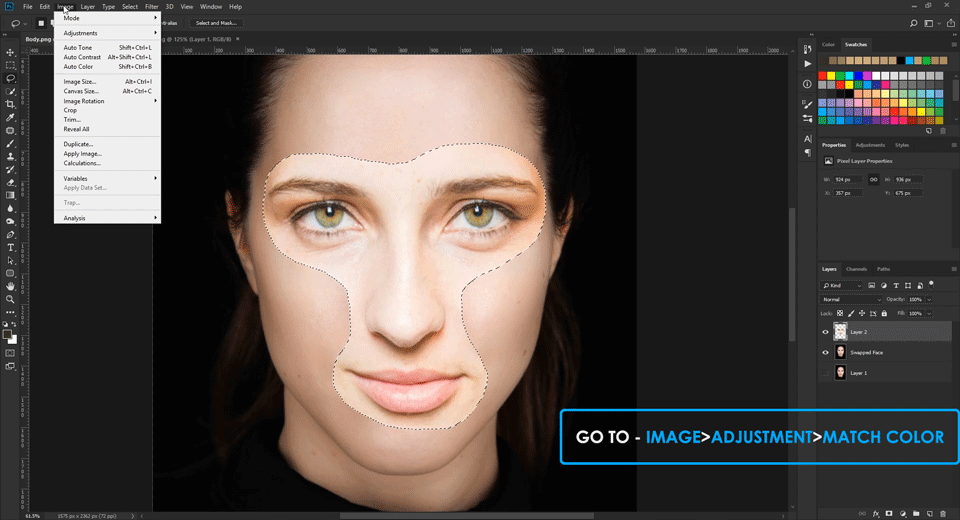
Match the color with the face that is under processing. To do that
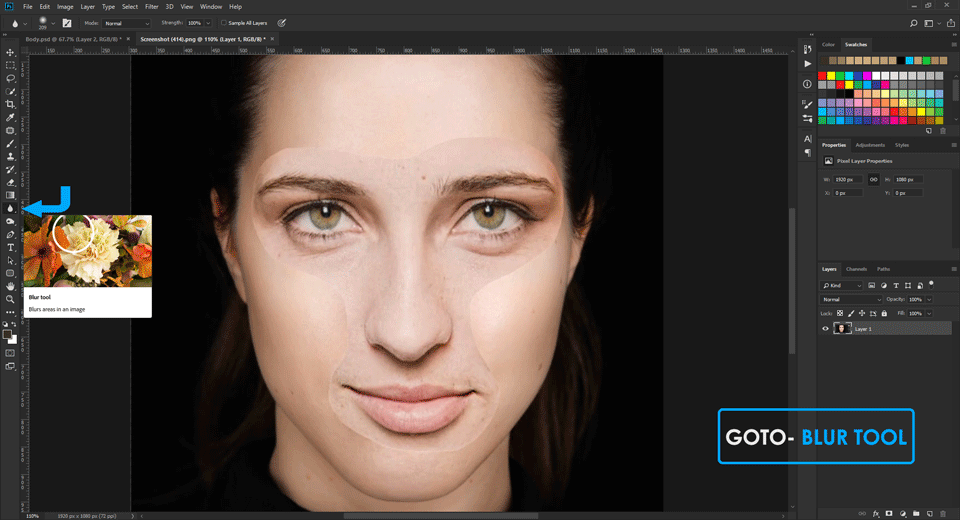
After the selection, a pop-up box will open. Match the color of swapped face with the new face from the source. And click OK.
Select the Blur Tool from the left toolbar. Now brush over the face to reduce the sharpness.
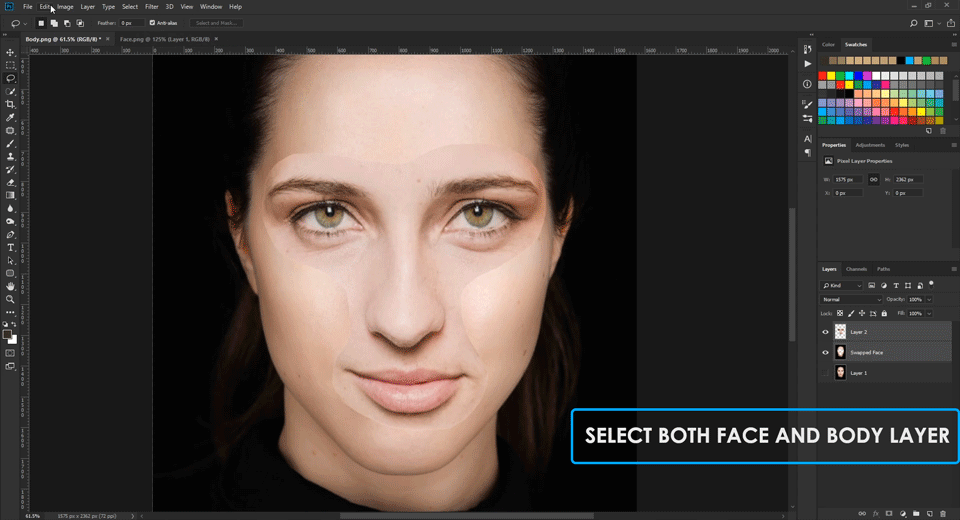
You will see that these steps, when implemented, necessarily apply Layer Masks to every single layer. When Photoshop Layer Masks is applied, these hide the areas which are under or excessively visible.
The Auto-Blend Layers in Photoshop CC from the dropdown menu will come in handy to tweak hidden layers or variations due to creepy color.
To do so:
That’s all for today! Now you’ve got a glorious image following our “how to face swap in Photoshop” guide. We’ve tried our level best to help you out.
Now it’s all done!
Swap faces in Photoshop can be a lot of fun, and you can impress anyone with your amazing Photoshop technique! You don’t need to be an expert to perform this.
While taking product photos one question that all of us have is, “will my product photo look impre ...

Selling items online has become the new trend and people are pursuing this version of shopping whole ...
Photoshop brush tool comes in handy when you require painting on any document. Photoshop has plenty ...

Images that we see normally are called raster images. What is a raster image? Raster images are cons ...