How to take Product Photos like a Pro
While taking product photos one question that all of us have is, “will my product photo look impre ...
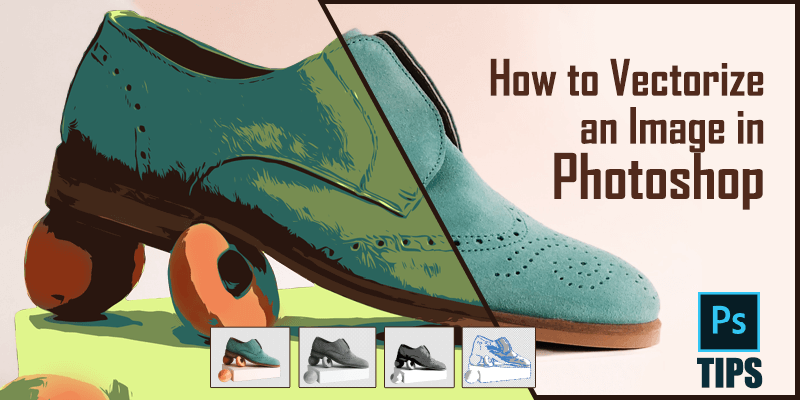
Images that we see normally are called raster images. What is a raster image? Raster images are consist of pixels, that work in rows and columns with different colors to render an image. Raster images are also known as bitmap images and they are resolution-dependent because of their expression via bitmap. If a bitmap image needs to be resized, the image quality will be decreased. If the image is redimensioned to smaller, pixels must be eliminated and lines and curves are jagged and defined by a clear gradient if you increase the size. Today we will be talking about, “how to vectorize an image in photoshop?”
Raster to vector conversion in photoshop comes useful when you need a lossless image quality. As vector images don’t lose quality, you can make them large or small anytime you want and use them anywhere. Vector graphics are used to make logos, icons, graphical content, cartoons, etc. In this article, I will be giving an in-depth photoshop tutorial for vectorizing a color image in photoshop. So let’s get started…
Above I have discussed, how you can convert raster images to vectors from color images to B&W images. Now in this portion, I will talk about the vector convection from color image to color image. Without wasting any time let’s get started.
Step 1: Insert your image in adobe photoshop cc.
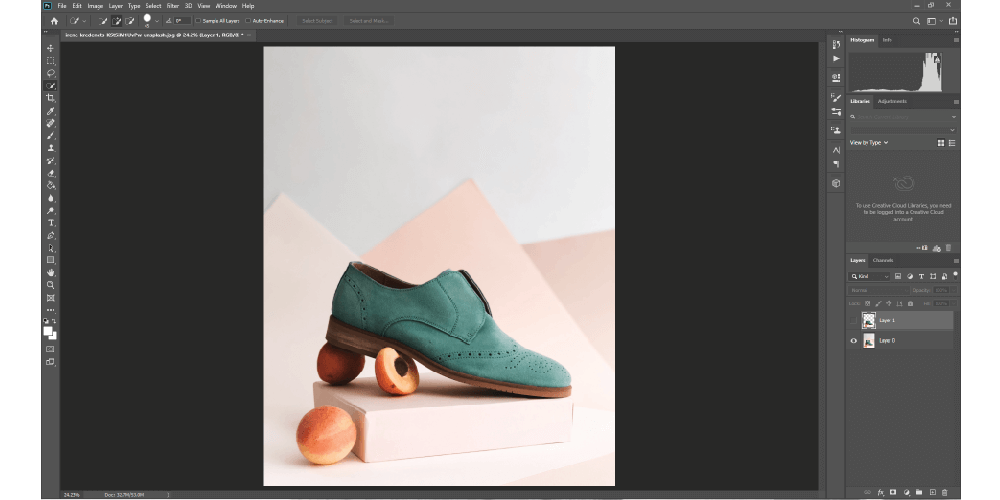
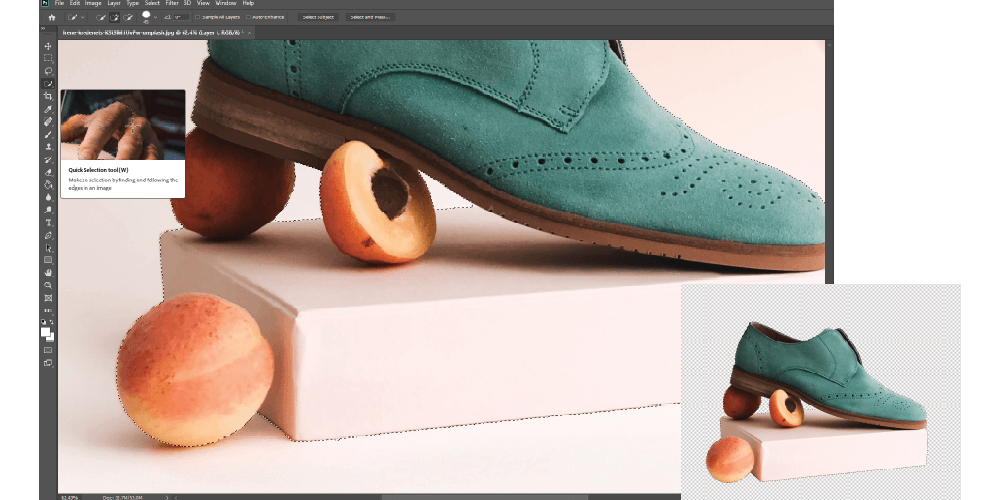
Step 2: After inserting the image in photoshop the first thing we need to do is isolate the image from its background. To do that we will use Photoshop Selection Tool. You will find the tool on the left side in the Toolbar section.
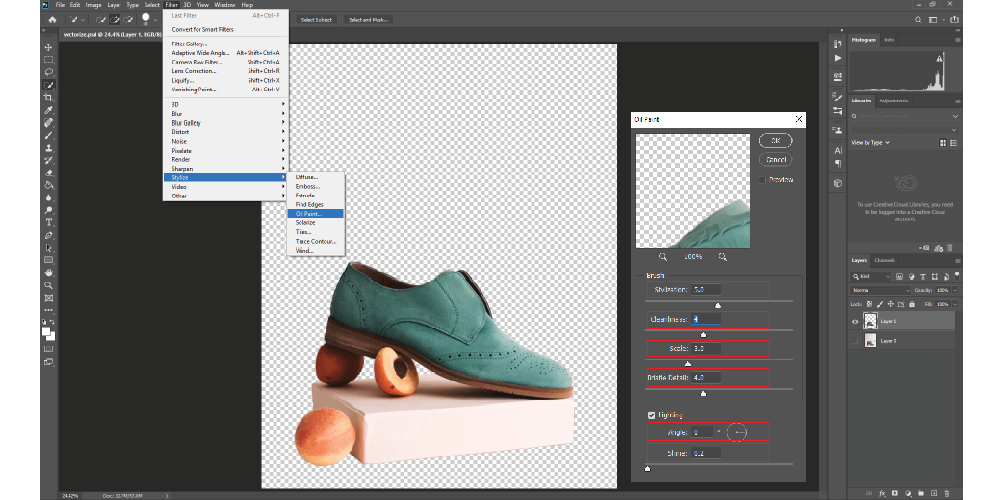
Step 3: Now it’s time to give the image the cartoony feel that we will see after vector conversion. To do that go to Filter>oil paint. A window will pop up from there we have to change a few settings. Set the value according to your taste. For this tutorial, I have set the value given below.
Step 4: To do a successful vector conversion another important thing that we need to do is to create a B&W. To do that we have to go to Image>adjustment>Desaturate.
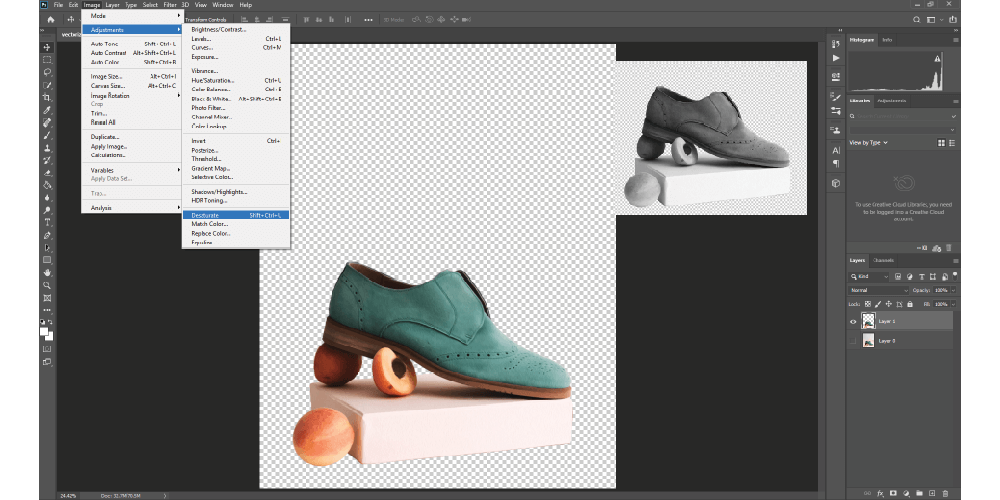
Step 5: Now we will create a duplicate layer so that we can work on it individually and our main image remain unharmed. To create a new layer go to Layer > New Adjustment Layer and set the name for this layer to Layers. Then we will clip this layer to the new layer.
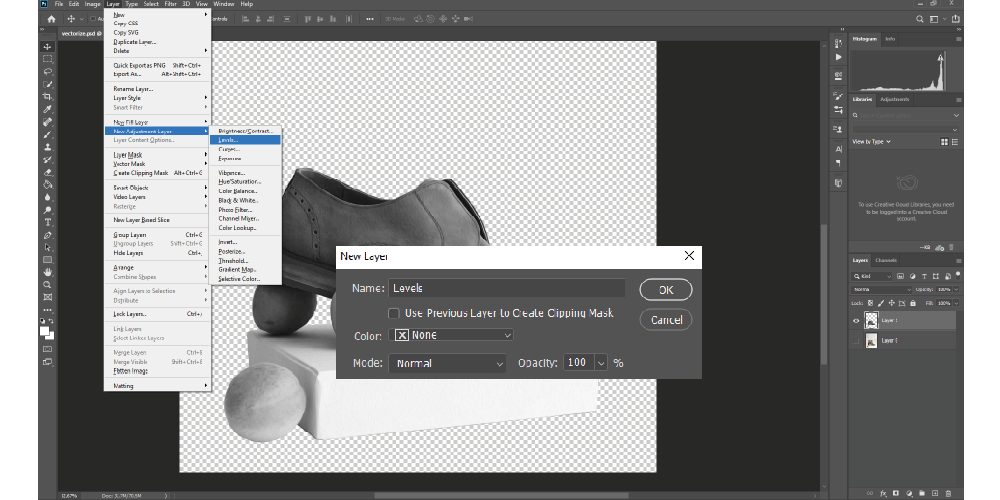
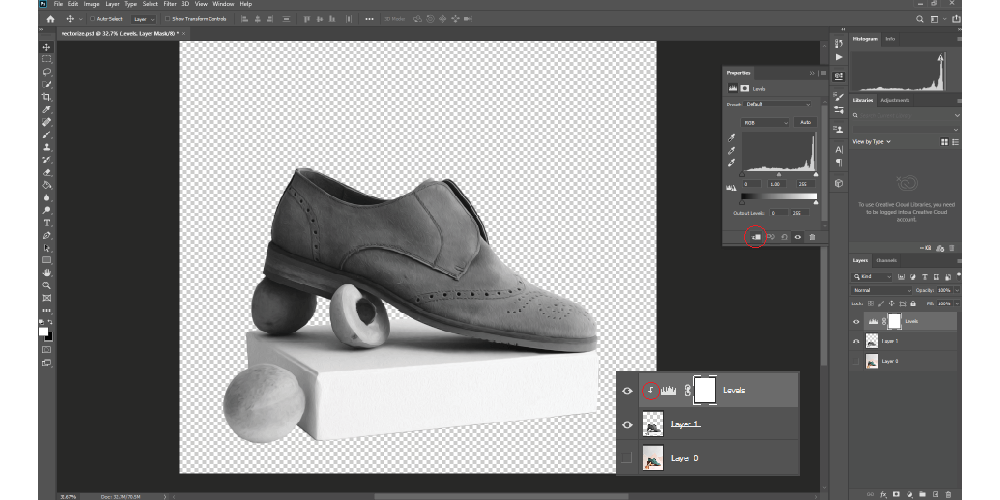
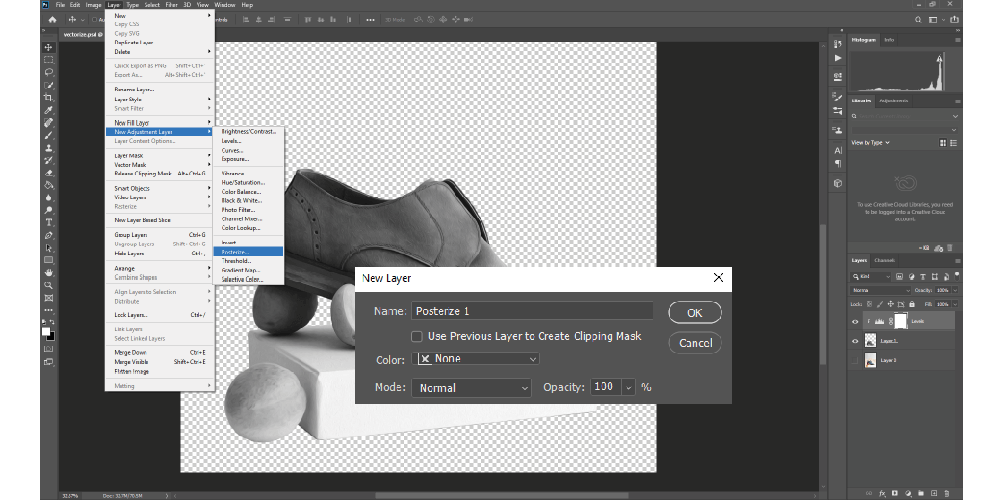
Step 6: in that new layer we will do posterizes and clip this to the layers as well. Go to Layer > New Adjustment Layer > Posterize and Clip to layers. This determines the values for the number of colors to be in the vector image, in this case, we keep 4.
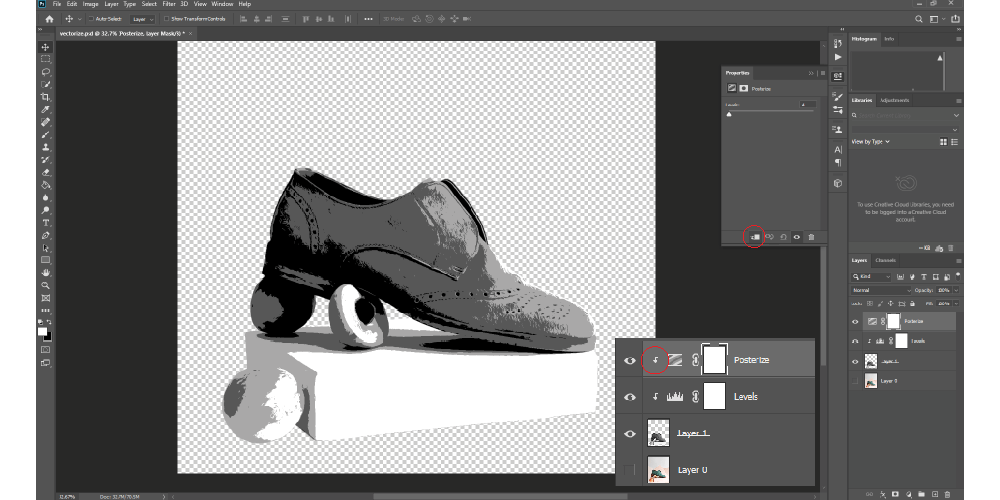
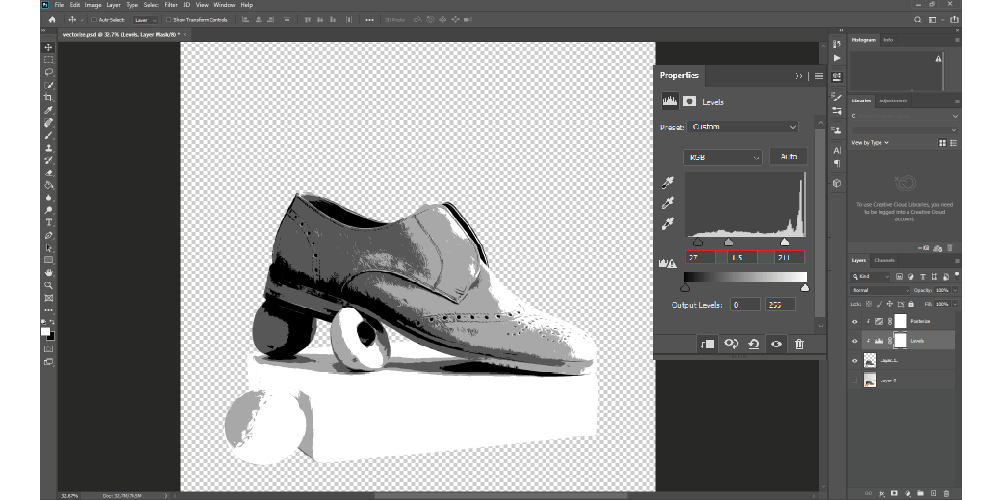
Step 7: After that now we will set the color density. Double Click the levels layer to open it and adjust the color density.
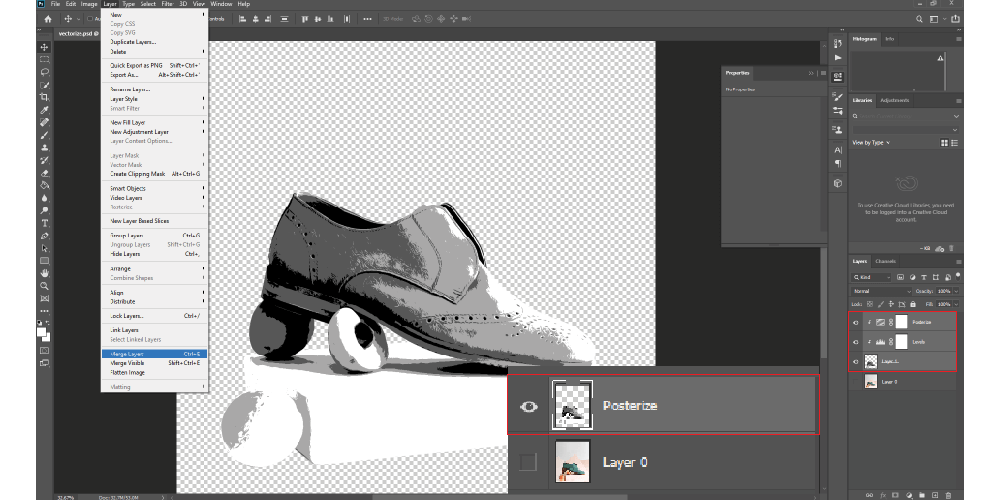
Step 8: Now merge all the layers (Level+Posterize+image).
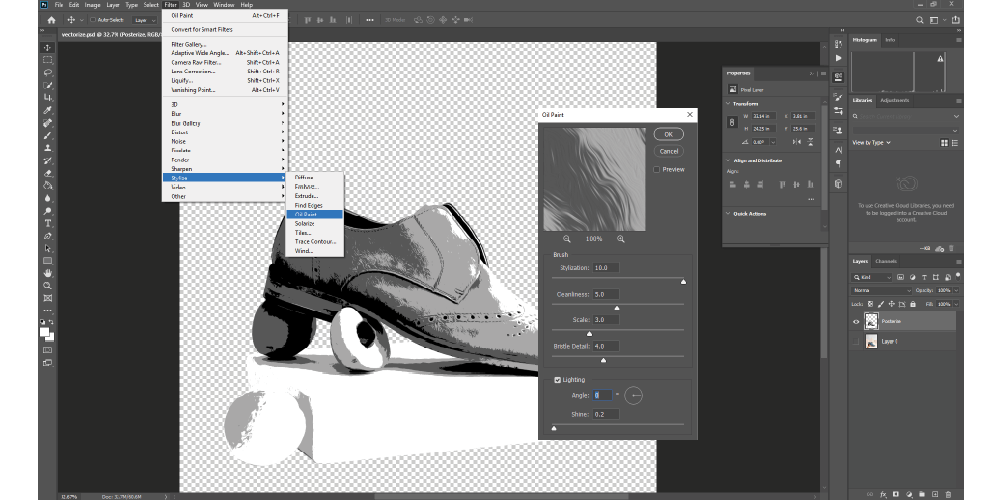
Step 9: Select the merged layer and apply the oil paint again. This time I have set the value as below. Now rename the layer as “Base”.
Step 1: It’s time to work on the B&W image and make the vector perfect. To keep the white color double click Base Layer→ Blending Options→ Adjust the layer level.
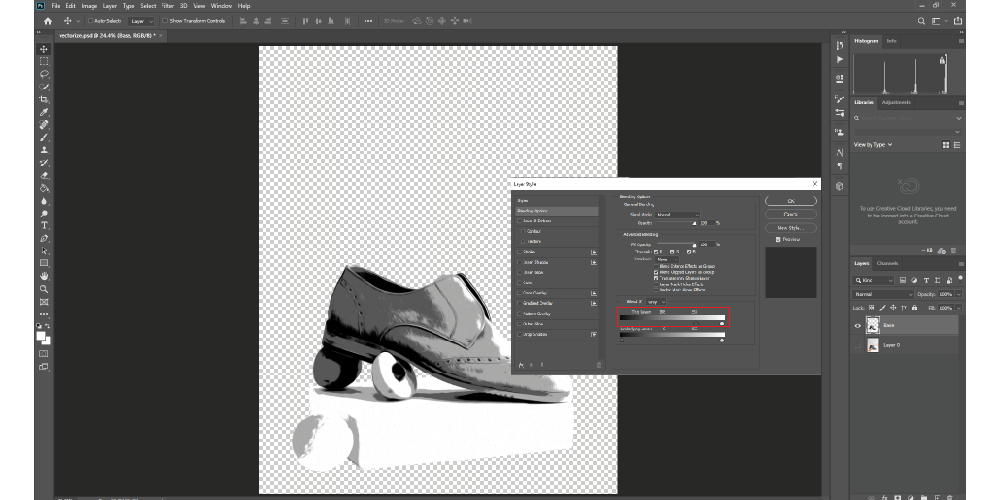
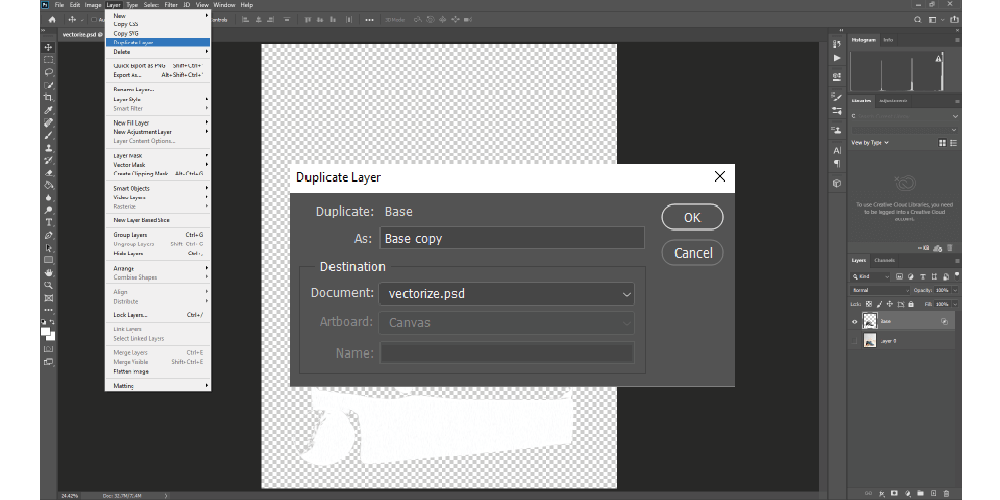
Step 2: Now we have to create the layer to the smart object. Duplicate the Layer → Smart Object→ Ctr+Click on the layer thumbnail for the selection.
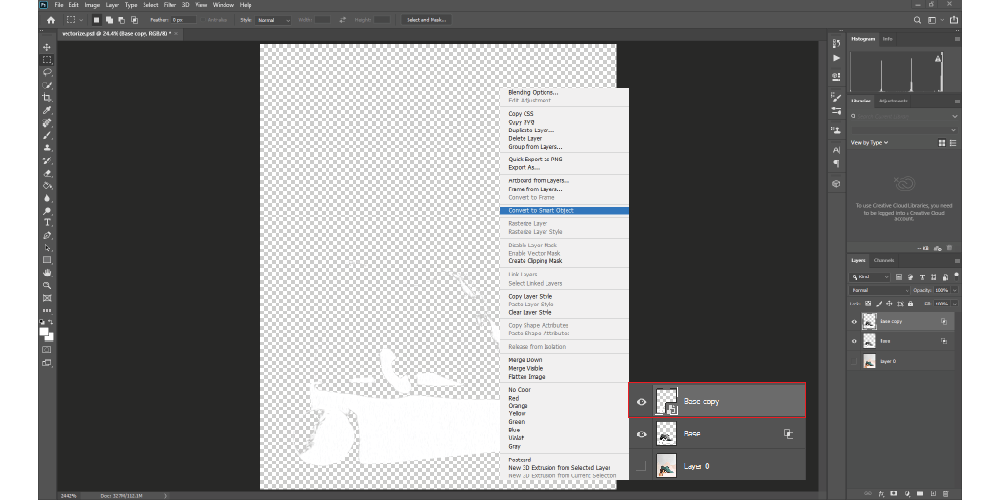
Step 3: We need to select a work path and to do that select any Selection Tool→ Right Click→ Make Work Path and set the Tolerance to 1.5.
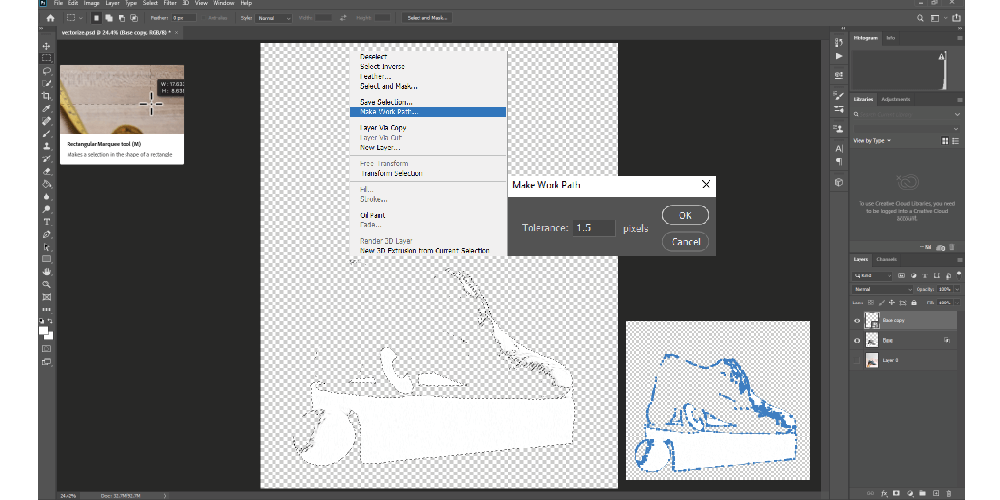
Step 4: Then select the Layer→ Solid Color→ Select the White Color→ Rename the layer as “Highlights”. After that delete the Duplicate Layer and hide the Highlights Layers.
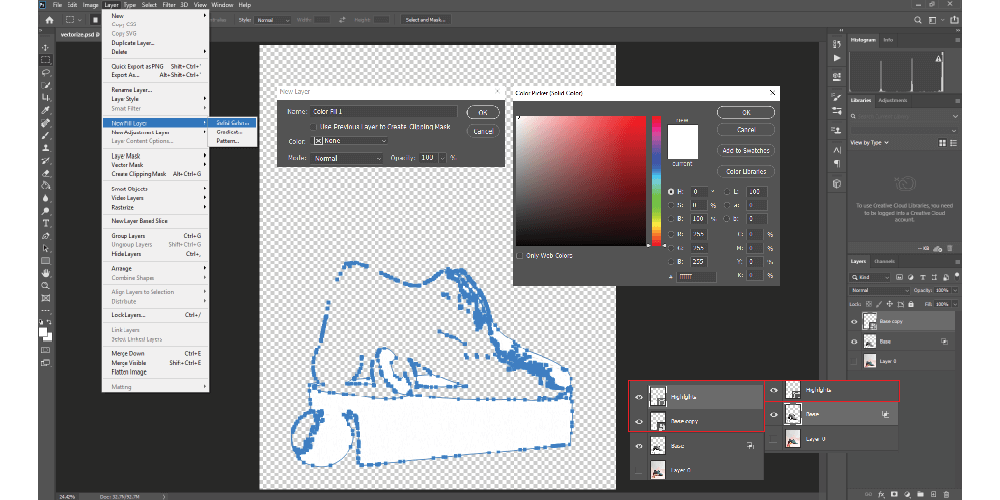
In this part, I will separate the off-white color and work on it separately.
Step1: Double click base layer> blending options> adjust the layer level and keep the off-white colors only.
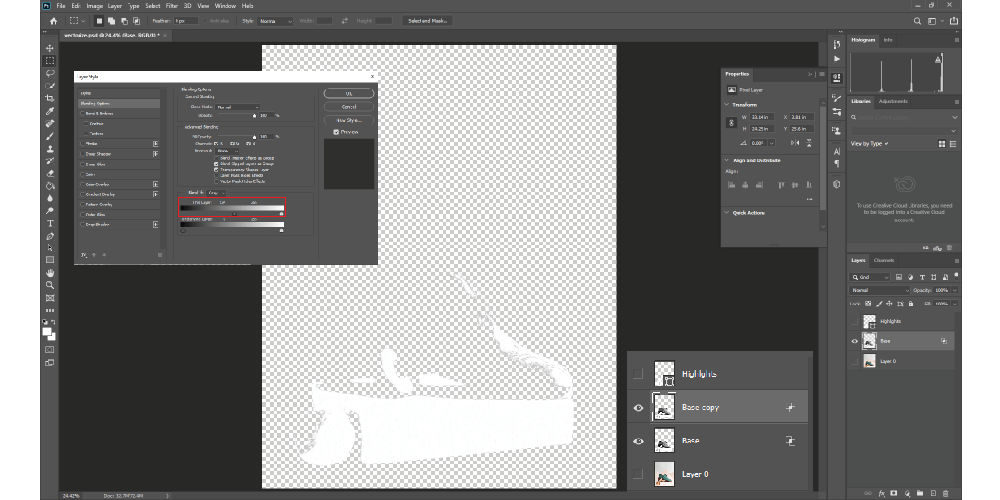
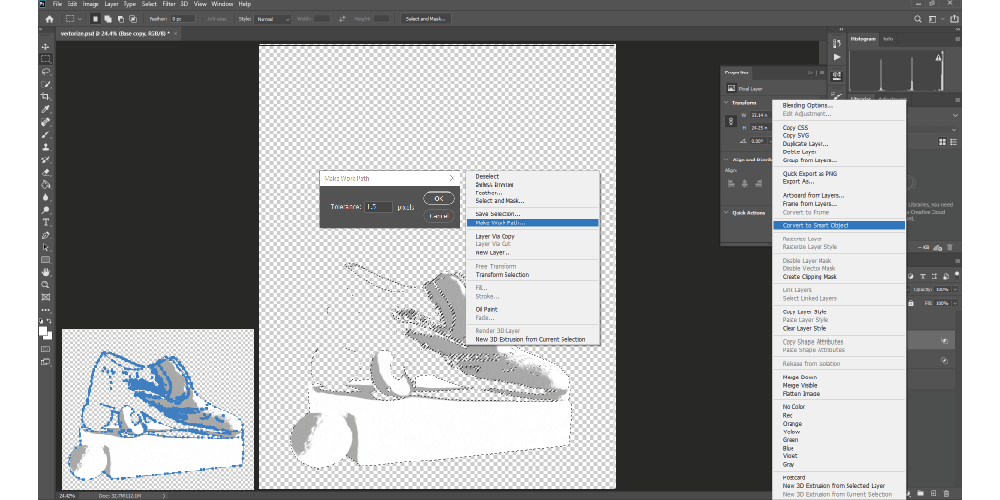
Step 2: Duplicate the Layer→ Smart Object→ Ctr+Click on the layer thumbnail for the selection, select any selection tool> right click> make work path> tolerance 1.5
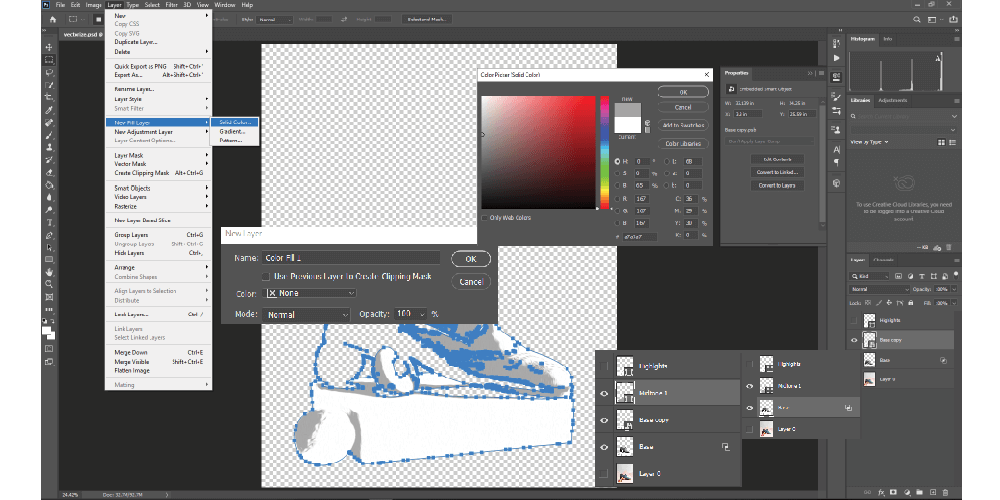
Step 3: Select the layer> solid color> select the white color> rename the layer as “Midtone 1”. Delete the duplicate layer and hide the Midtone 1 layers
Please follow the above-mentioned process for the remaining two layers (Midtone 2 + Black color)
Step1: Double click base layer> blending options> adjust the layer level and keep the off-white colors only.
Step 2: Duplicate the Layer→ Smart Object→ Ctr+Click on the layer thumbnail for the selection, select any selection tool> right click> make work path> tolerance 1.5
Step 3: Select the layer> solid color> select the white color> rename the layer as “Midtone 2”. Delete the duplicate layer and hide the Midtone 2 layers
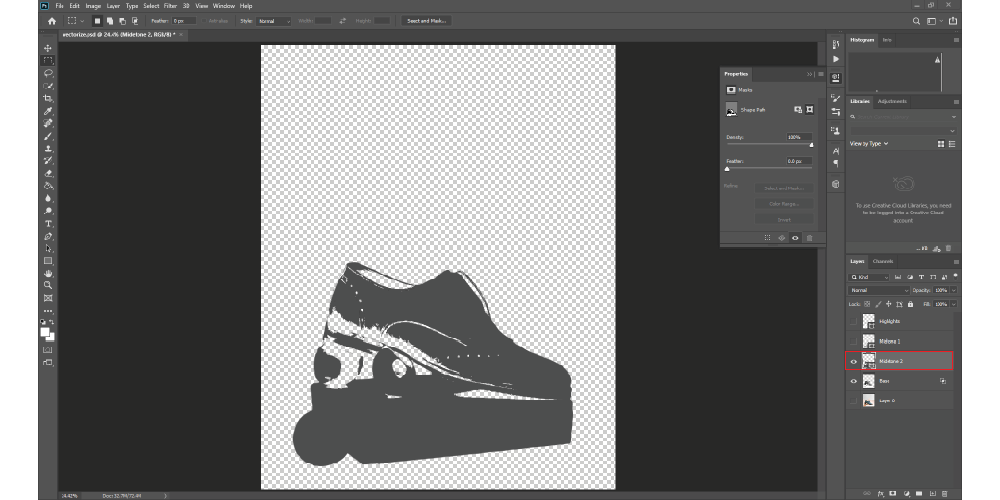
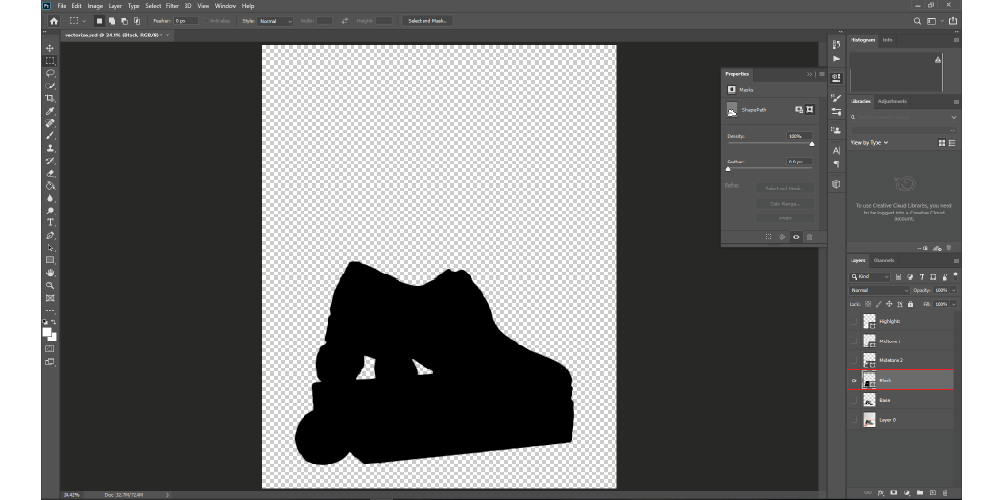
Step1: Double click base layer> blending options> adjust the layer level and keep the off-white colors only.
Step 2: Duplicate the Layer→ Smart Object→ Ctr+Click on the layer thumbnail for the selection, select any selection tool> right click> make work path> tolerance 1.5
Step 3: Select the layer> solid color> select the white color> rename the layer as “Black Color”. Delete the duplicate layer and hide the Black layer
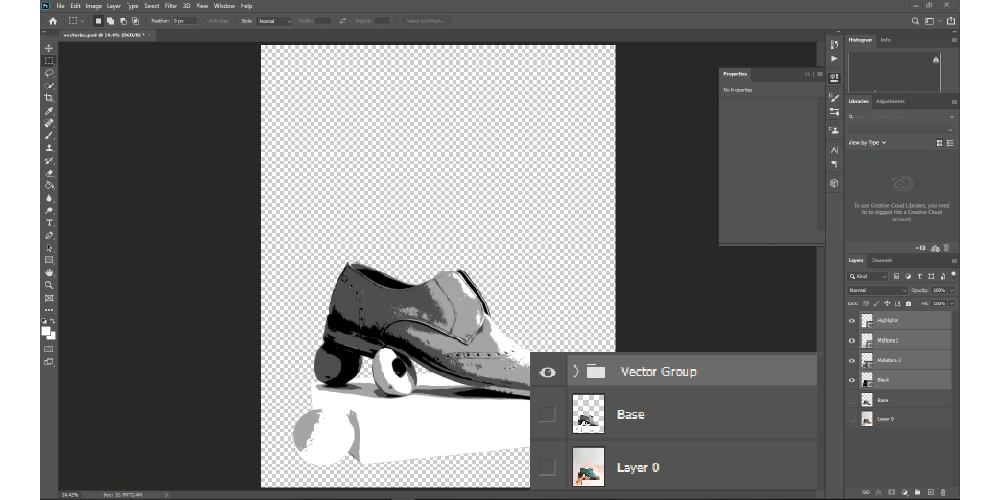
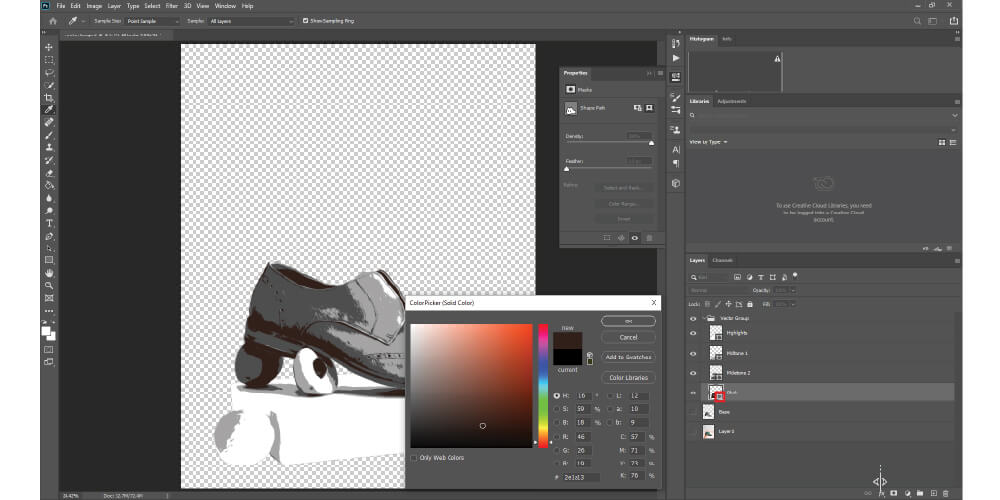
Or if you want B&W vector image then you can remain the image just as it is.