


How to Sell Online Without SSN? No SSN, No Problem!
As a minor or a temporary resident, it could be difficult to sell online without a Social Security N ...
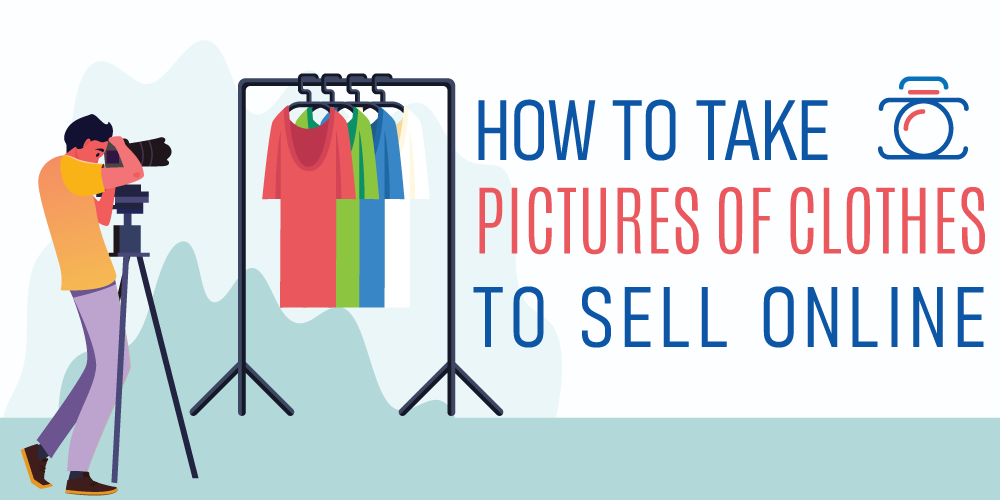
How to take pictures of clothes to sell online? If you are an online seller, then you must encounter this question countless times. Every time you asked this question, I bet you never got the perfect answer. Well, today I will try to provide a full-fledged answer to this question so that after reading this article you don’t need to waste your time in the future.
Clothes can be glossy, stylish, formal, or casual, but presenting them for selling should be flawless. Selling products online isn’t easy because you can impress your customer by word of mouth only. You can write history in the product description, but the consumer will barely read those.
Before buying any products, the first thing consumers see is the image of the product. So attracting consumers and increasing your sales, you have to know how to photograph clothing products correctly. In this article, I will be guiding you on how to take pictures of clothes for online stores.
Setting up your photography studio for product photography is important when you are going to shoot apparel products. From photography lighting setup to the camera settings, each and every detail need to be perfect while shooting.
Without proper photography lighting setup, your image will come out blurry, darkish, and sometimes grainy. For product photos, you always want the best in the business. So high-resolution product photos with no grainy or blurry issues should be the one and only choice.
To get the maximum result, I would suggest you follow the three point lighting photography rule for product photography. As the name, you need three light sources as the main three point lighting kit. You need to place them accurately to get the highest result.
Before placing the light sources put the backdrop for your shooting. Remember to use a white solid background because it’s a requirement of most of the online stores. So after placing the white backdrop, set up the lighting sources.
Place one light source next to your camera, which will work as the main light in the product shoot. The second source will go near to your product at a 45-degree angle but keep it far from the 1st one.
The last one will place between your product and the backdrop. The second light source is called fill light and the third one is hair light.
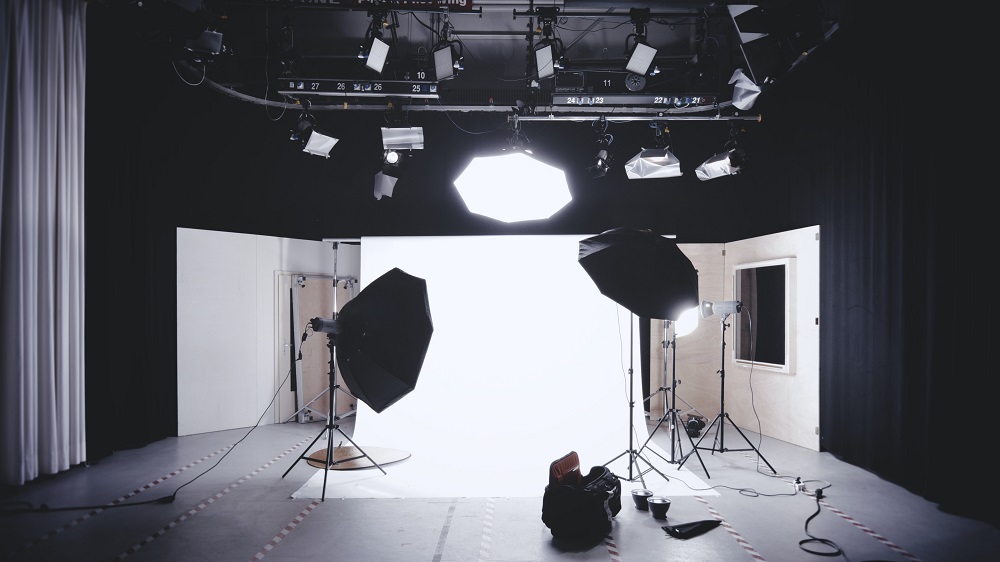
Photo by Alexander Dummer from Pexels
Note: See the image of three point lighting examples above to understand it more clearly.
After setting up the studio, it’s time to set the camera settings. There are a few specific camera settings for product photography that you can follow to make the product photography first class

Photo by https://www.creativepadmedia.com/
Aperture helps you to focus on your product and capture detail with texture. For product photography, capturing the detail is important. To get the maximum clarity, keep your aperture number between f/8 and f/11.
Shutter speed refers to the camera shutter, which closes when you capture an image. The long the shutter remains open, the more light can enter the camera and light up your image. But remember, if the shutter remains open for too long, your image will burn.
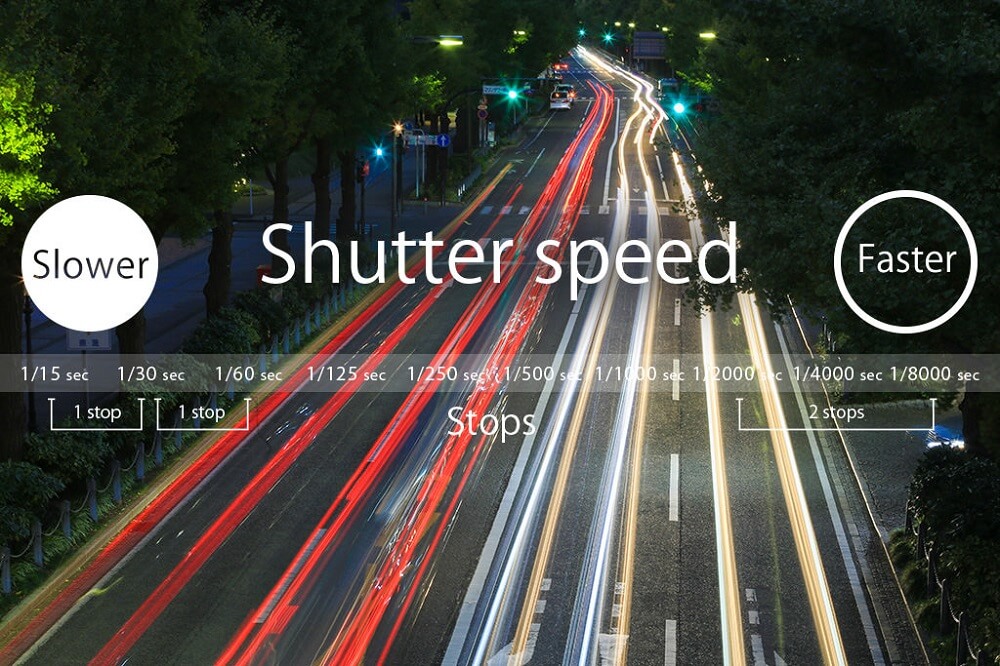
Photo by https://snapshot.canon-asia.com/
Note: To avoid this problem and capture dashing product photos for clothes set the shutter speed around 1/125.
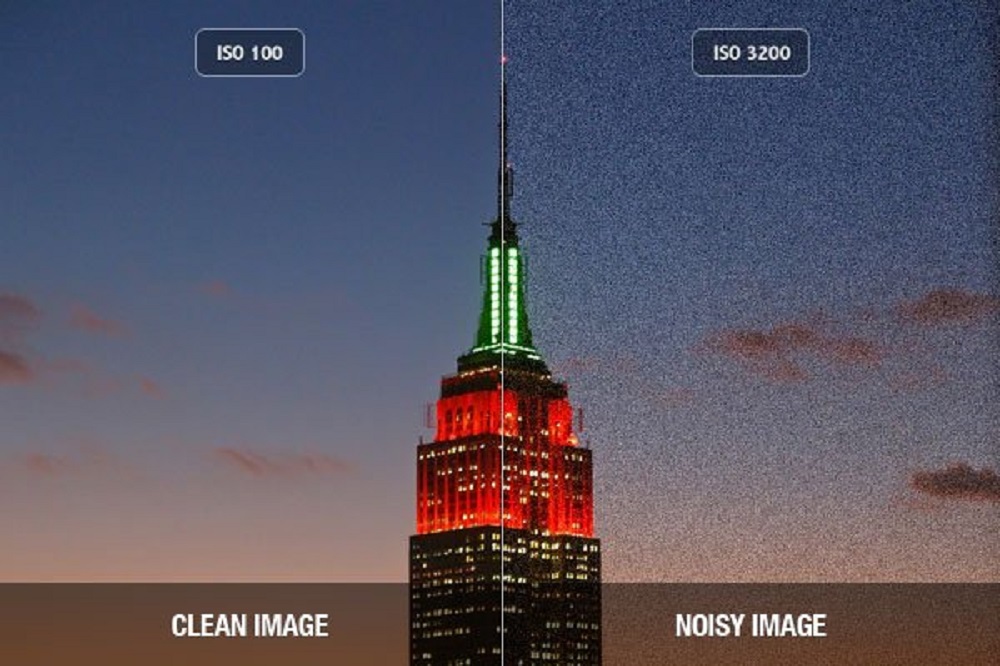
Photo by https://www.exposureguide.com/
As shutter speed allows lights to enter, with ISO you can control how much light you will use in your shoot. For natural lighting, keep your ISO between 400 to 800 or if you are using artificial lighting, then the number will be in between 600 to 800.
Now that you know the photography studio setup ideas for clothing products, let’s talk about how you can shoot the clothing products of yours that can help you achieve that premium result.
Taking pictures of clothes is different than other typical photography or even product photography. In order to protect humanity from unfavorable climatic conditions, human beings typically wear pieces of garment-also known as skirts, garments, or clothes on the body.
At first, wearing a dress was a necessity, but today it’s not only a necessity but also becomes carrying your personality with it. Because of that, photographing your attire product should also reflect that.
So there are few effective ways that you can follow for better, effective, and magnificent apparel product photography.
When you are selling wearable things you can’t find any better option than shooting them with models. Yes, models are a bit expensive, but you will find a much more customizable option during photo shooting your clothing product.
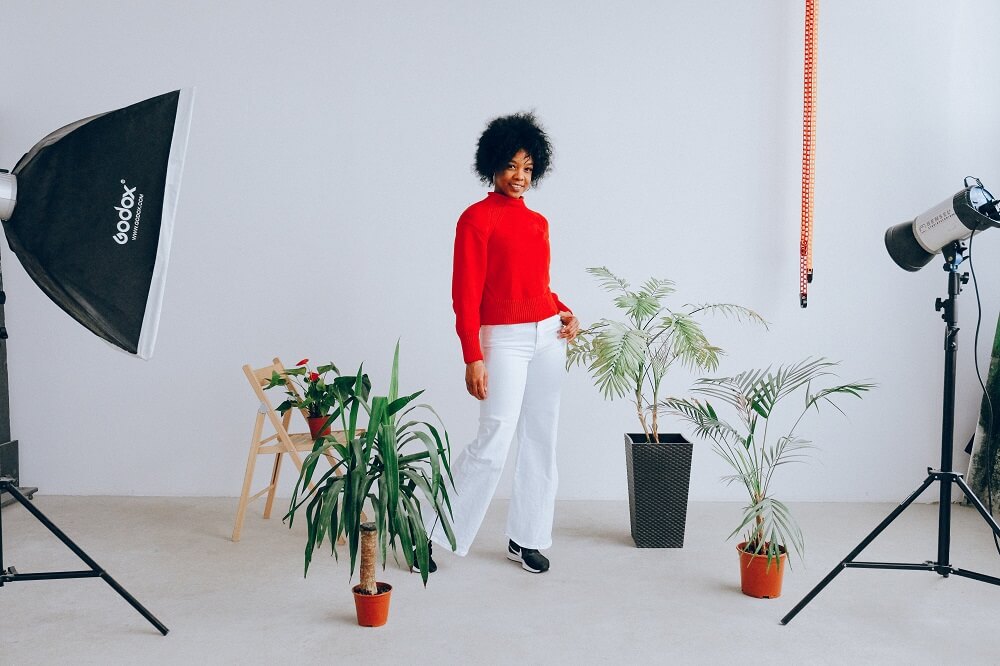
Photo by Anna Shvets from Pexels
With models, you can do unique and stylish poses with your product, which can provide you flattering clothing photos to sell. Eye-catchy model photography will lead your consumer to purchase the product.
As I previously mentioned, people don’t carry only clothes with them anymore. They carry their personality, taste, and choices with it. Model photography with apparel products provides an idea of that personality to the consumers.
It has also some downsides like getting the schedule according to your need. Model photography is also quite expensive compared to other ways of clothing photography like “invisible mannequin effect”, or “flat lay photography”. On the other hand, if your model gets acne scars or pimple scars on the shooting day, you can do anything about it.
If you want to avoid all these issues but still produce realistic like clothing images, then do the ghost mannequin effect service. Below, you will find the technique.
The ghost mannequin effect is redefining the limits of apparel photography. Unlike models, with mannequin effect, you need not worry about scheduling or expenses. The invisible mannequin requires product photos with an actual mannequin in it.
Then using photo editing software like “Adobe Photoshop cc” experts remove the mannequin. This gives a hollow or ghostly effect to the image, and it also provides a 3D look into it.
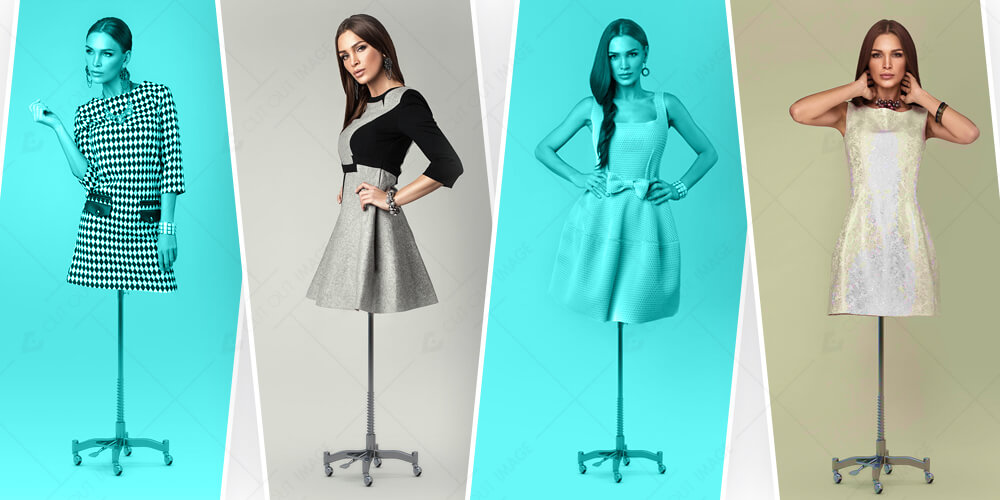
Photo by https://www.cutoutimage.com/
Selling clothing products online is continuously evolving in quality and pricing. People are getting premium quality products at an affordable price by sitting wherever they are. So keeping the price low and providing high-quality products is a challenge in itself.
To overcome the challenge, the invisible mannequin effect is a perfect choice. You can make them any pose you want, and they are cheap to afford as well. Ghost mannequin effect service has different types like neck joint service, sleeve joint service, and 360 invisible mannequin service.
According to your requirements, you can choose anyone you like and redefine your online apparel business.
To present your product online, you need to upload a minimum of 5 to 10 images per product. The reason is consumers need to see the product from different angles and in different scenarios to decide if they want to purchase it or not.
Providing all the images with ghost mannequin effects or models is not a clever idea for clothes. In that case, flat lay photography can be a potential alternative for presenting apparel products.
Photo by https://hespokestyle.com/
You should provide one or two flat lay product images in your online store to give your consumer a different angle to look at your product. In tabletop photography, you only need a table and proper lighting to get the proper outcome.
I wouldn’t advise your eCommerce store to use over one or two flat lay images unless you have to share fun visuals in social media. I think it’s much more worthwhile for your consumers if you display product photos in a more realistic way.
It is the new age product photography technique that can give the consumers a detailed and immersive product viewing experience online. You can integrate 360 product photography with model or mannequin photography.
You can do 360 product photography in two ways. One is using gears and the other one is using image editing software. Buying gear and managing it is expensive and in some way difficult.
Photo by https://hespokestyle.com/
The gear spins 360 degrees so to shoot 360 product photography using the gear all you need to put your model or mannequin on it and start shooting. You can shoot a 360-degree video or make it a gif if you like using the gear.
Doing 360-degree product photography using photo editing software is more of a budget-friendly way. To do it, you need to capture your product from all the angles first, and then the post-processing photoshop expert will merge them all and make a 360-degree image.
Here comes the part that completes our mission to start this article today. Till now we learned how to take pictures of clothes for online stores. To sell them online, you have to prepare them. After shooting the product, it’s time to post-process them to be able to sell them online. Let’s know how to stage clothes to sell online.
Apparel photos require multiple photo editing and retouching techniques to make them eye catchy. You may require different color photos or your product may have wrinkles. After shooting your product with a model, it may require a melting effect in photoshop, or liquify in photoshop.
As you saw there are tons of product photo editing apart from the typical ones like clipping path service, background removal, or ghost mannequin effect. Make your product photo amazing and flawless with high-quality clothing product photo retouching to draw visitors to your store.
To upload product images to online stores, you also need to follow online product image requirements along with the post-processing. Ecommerce stores like Amazon, eBay, Flipkart, etc. have their image guideline policy for product listing. One of the major image requirements for product image is white background.
I won’t dig deep with the online stores and their image requirements, but I do want to mention some important things in short words. Such as how to take pictures of clothes with a white background for ecommerce stores. For this I am picking two famous eCommerce stores, one is Amazon and the other one is eBay.
Amazon is one of the world’s top eCommerce platforms and to do business with amazon, only eye catchy product photos aren’t enough. You also have to follow amazon image requirements to upload your product photos in amazon listing.
White background on a product photo is a major photo guidelines and to make a white background for amazon product photos you can use white backdrop while shooting. Using a white backdrop in your amazon product photography session may not provide you with a pure white background.
In that case, you can post process your product image and make the background white by photoshop background removal technique.
EBay is another famous online product selling platform where if you want to do business you have to upload product photos according to their guidelines. You can follow the same way for making white background product photos in ebay product photography.
Product photos without a white background, just like amazon, eBay also doesn’t encourage its retailers to upload product photos. So use white backdrop and background removal service to produce white background clothing photos for eBay.
Optimizing clothing product image is best for ranking your online store. By image optimizing, I didn’t mean the editing and image resizing part. Whenever you upload your product image on the listing, give your image file a name.
Rename your image file name, alt and title attributes of your product image. This will help your image to perform better in the search result.
Knowing how to take pictures of clothes to sell online is the biggest take for clothing retailers. Online platforms are getting famous and also competitive as the time is going. So standing out in the crowd, you have to continuously produce premium and impressive product images.
In this article you will get a complete guide for taking your clothing pictures to sell online. Hire a professional commercial product photography who has all the setup you need for your clothing photography.
Then outsource your images for post processing to make your product image eligible for uploading in the product listing.

As a minor or a temporary resident, it could be difficult to sell online without a Social Security N ...

Are you looking for the best way to enhance your Amazon product listing to stand out among the compe ...
Tradexcel Graphics is a creative boutique video production company with a track record of making awa ...

As the decades go by, tech and communications are increasingly becoming intertwined with our life. W ...