


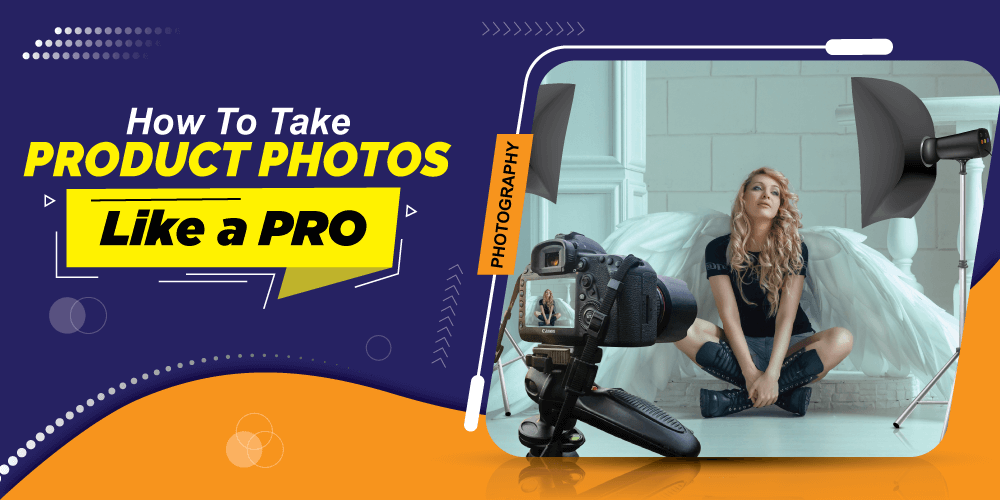
How to take Product Photos like a Pro
While taking product photos one question that all of us have is, “will my product photo look impre ...
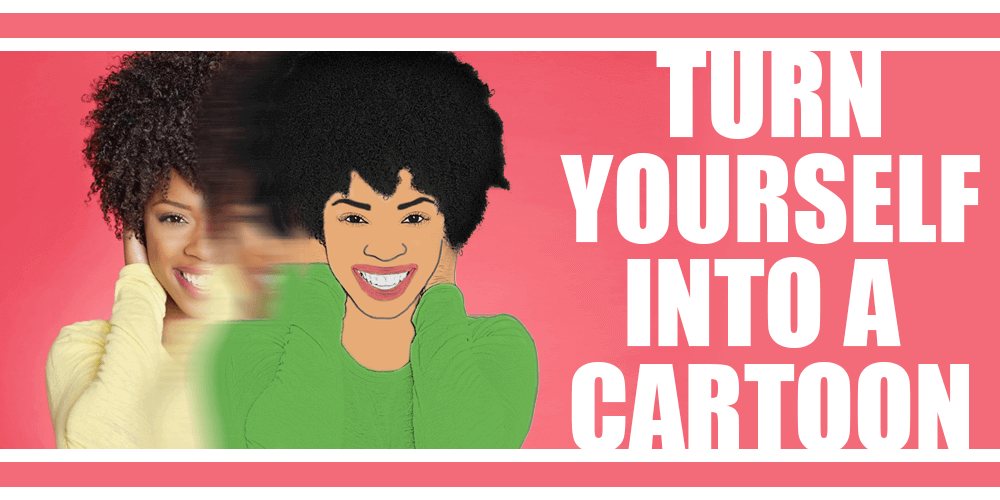
Here is the guide to making a cartoon in photoshop and anime drawings using filters in Photoshop and Brush Tool for a little painting.
Creating this effect is very easy to achieve a funny, interesting result. Just follow the steps below and turn yourself into a cartoon.
Many companies use cartoon illustrations and caricatures for promotional use. They use them in logos, print work, on T-shirts, on their websites and other promotional items.
Cartoon art portrays a friendly, approachable image for businesses. This is used to making a cartoon in photoshop for decipherable brand creation.
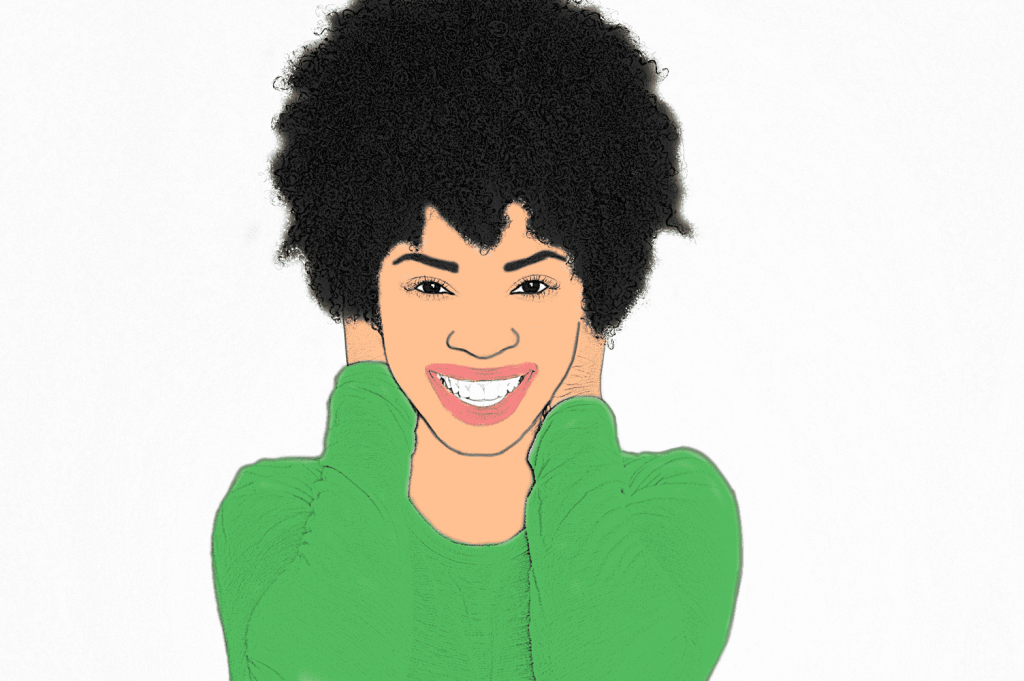
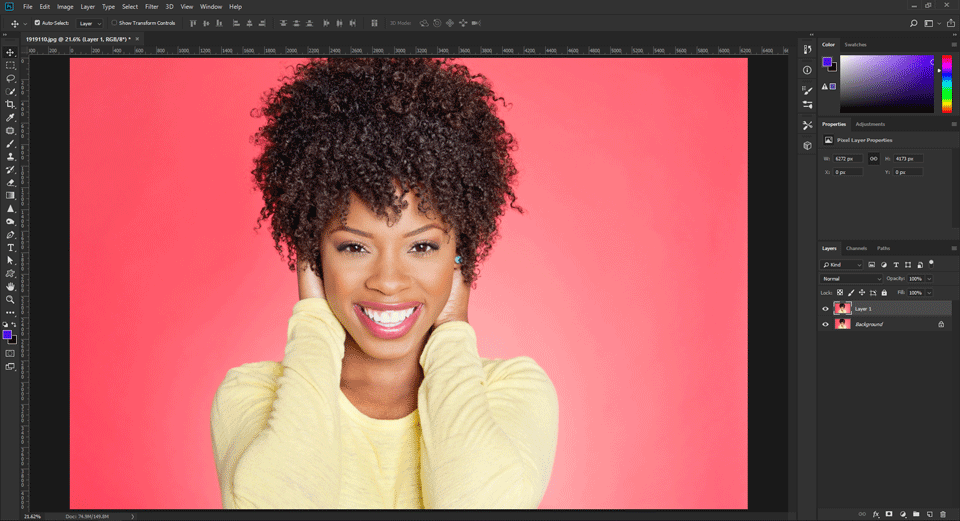
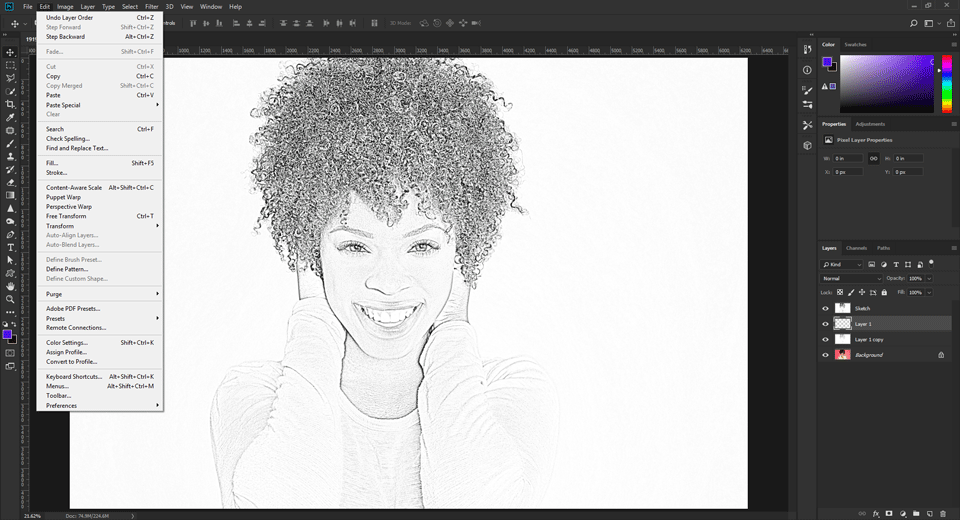
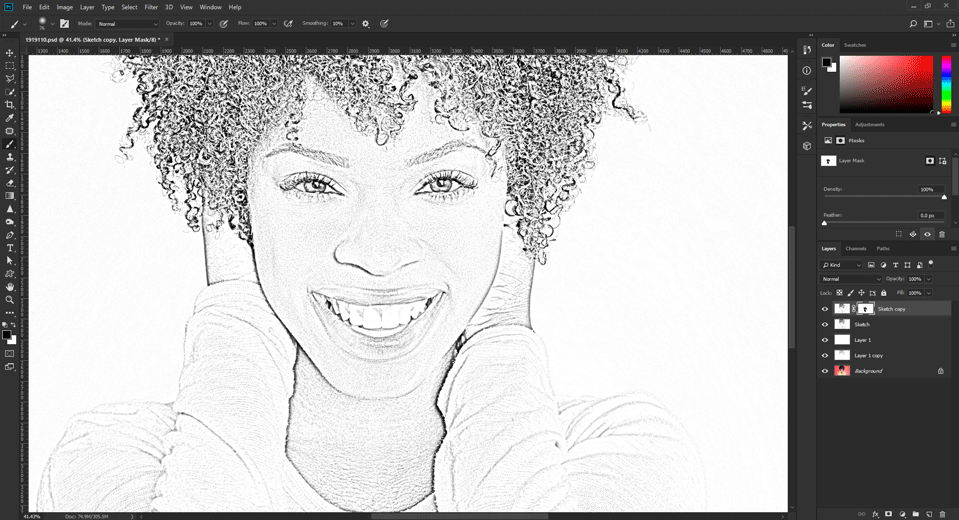
Look at the Original Photo.

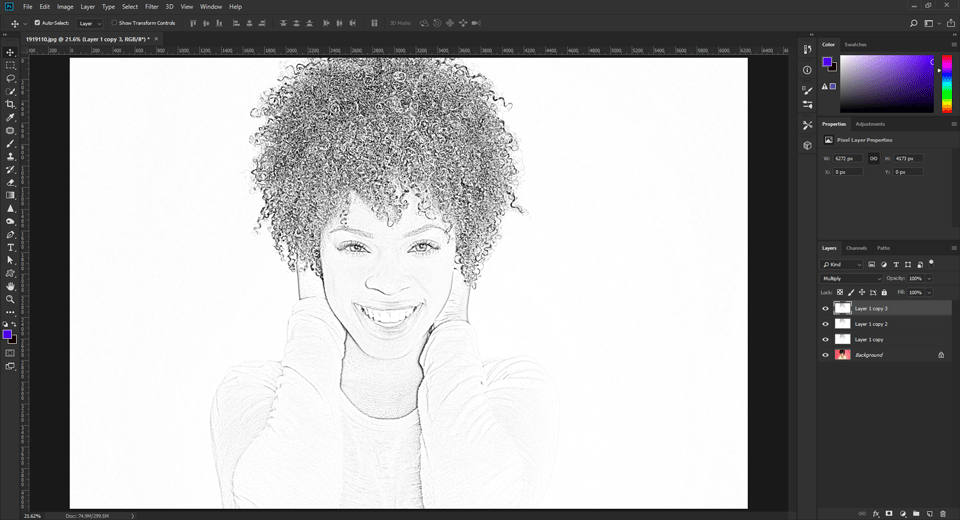
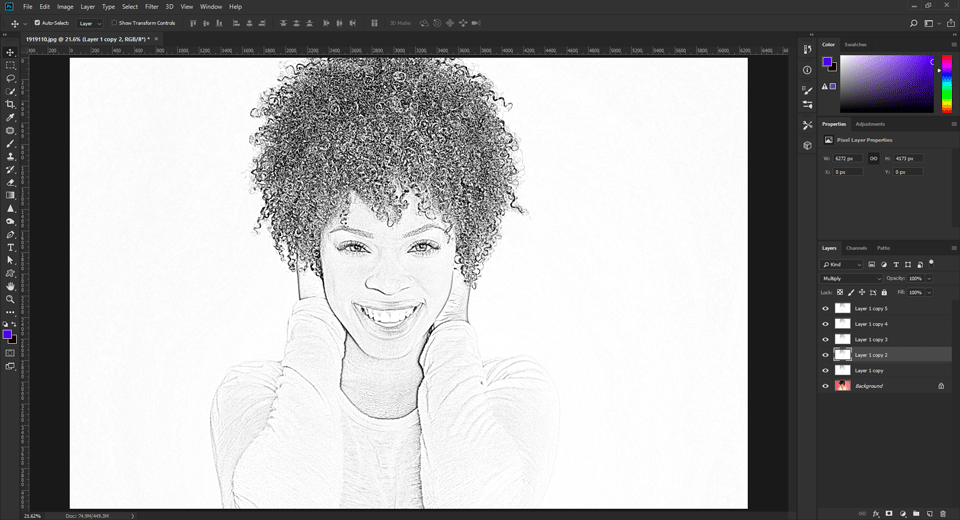
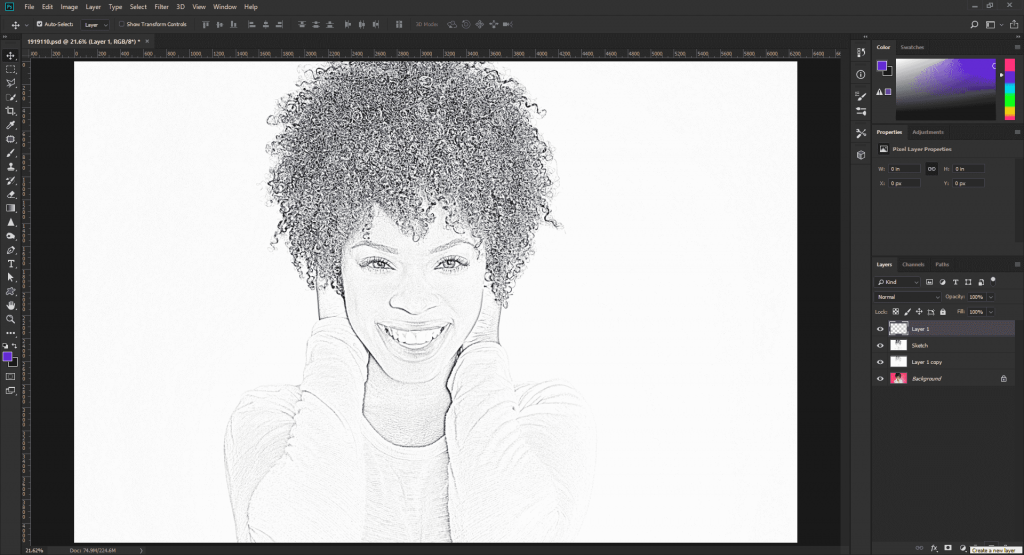
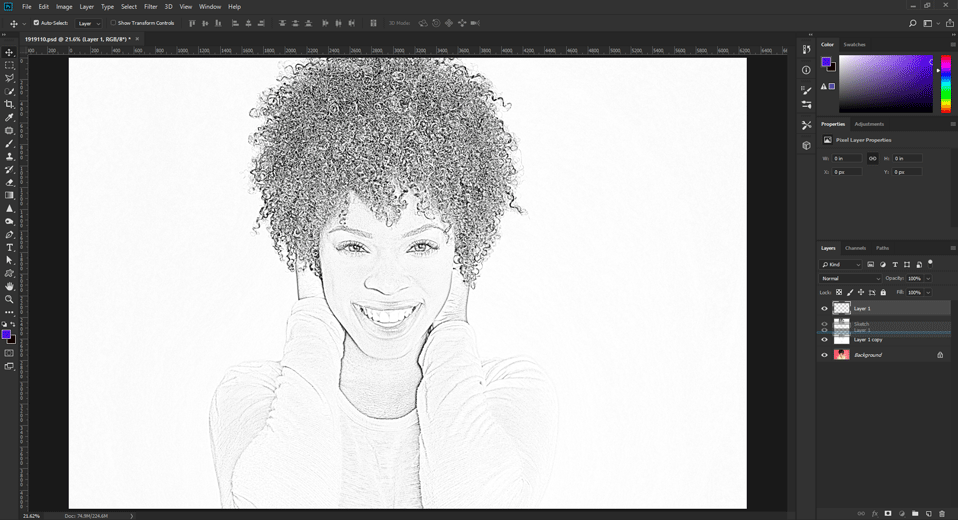
And the results of what you’ll get is here.
At first, onset the Photo which you want to convert into cartoon. Then follow these steps by turns.
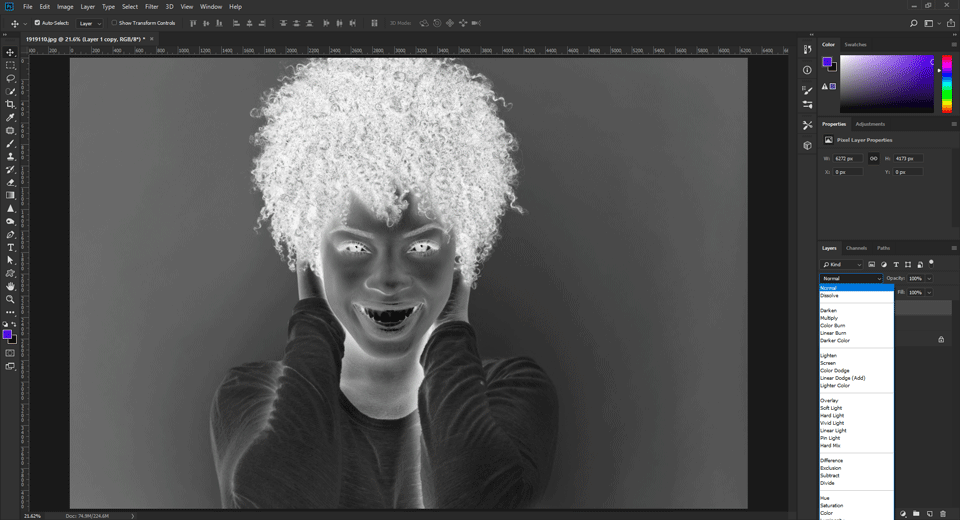
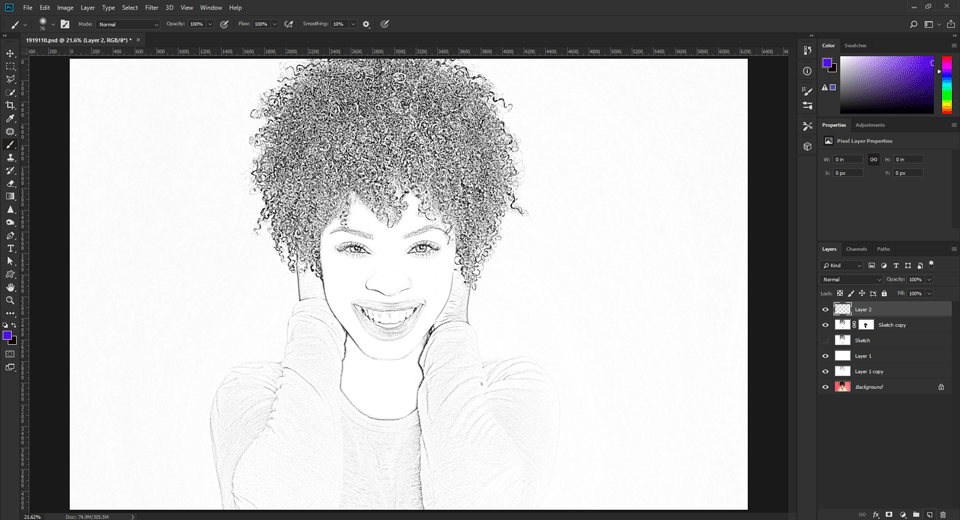
Simple compositions work best for a photo to cartoon in photoshop editing. Nothing to worry if the image becomes entirely white when making a cartoon in photoshop.

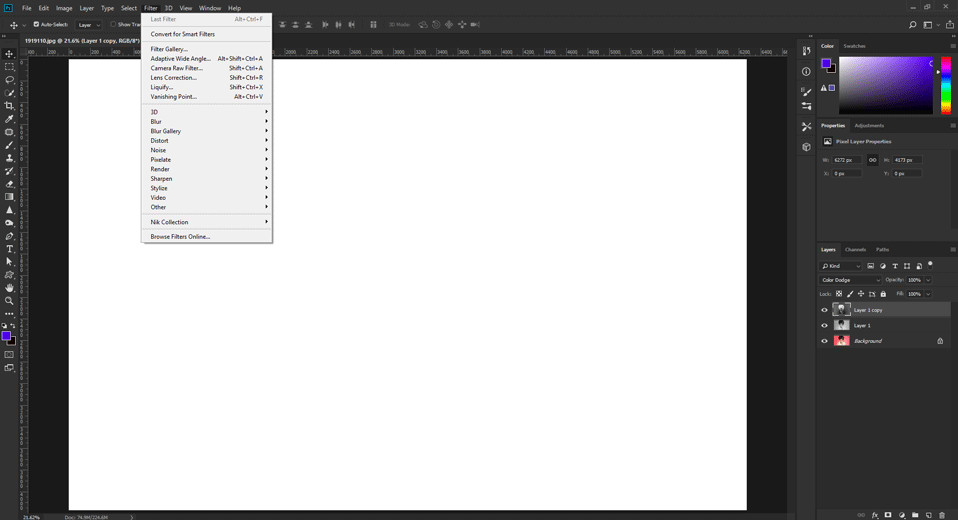
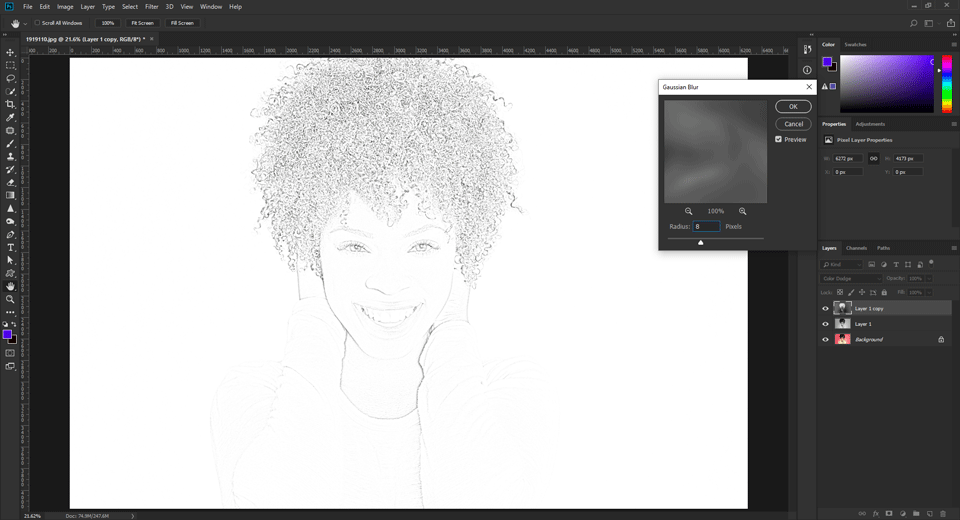
Filter > Blur > Gaussian Blur.
Tip#1: Press Cmd + J (for Mac) or Ctrl + J (for Windows) to duplicate the layer of the background
Tip#2: For desaturation, hold down Cmd + Shift + U or Ctrl + Shift + U buttons
Tip#3: Press Cmd + I or Ctrl + I to invert
Follow these steps as a solution if it doesn’t provide defined lines.

Tip#4: Merge the layer by pressing Cmd+ Shift + Alt + E or Ctrl + Shift + Alt + E
Tip#5: Hold down Cmd+ J or Ctrl + J to copy
Tip#6: Shift + click the layer above the background and hit Cmd/Ctrl + E to merge all the layers together
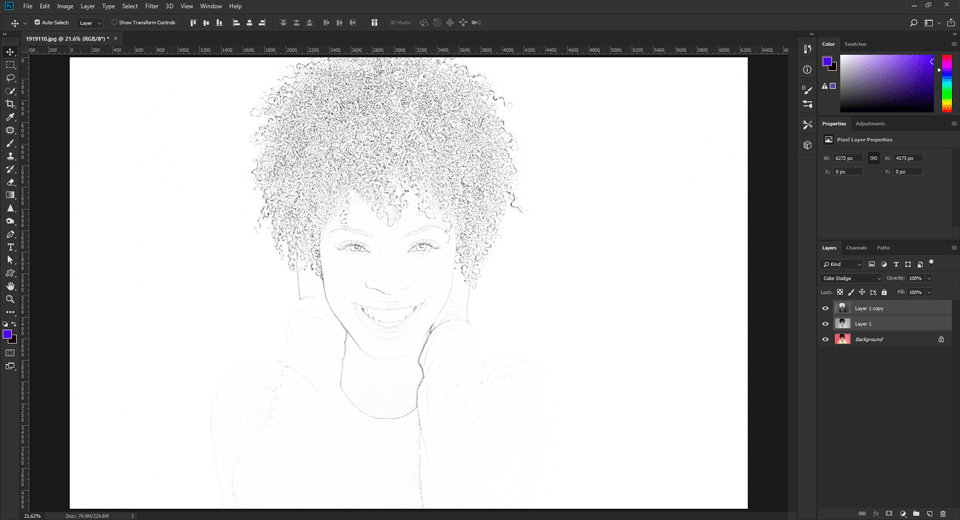
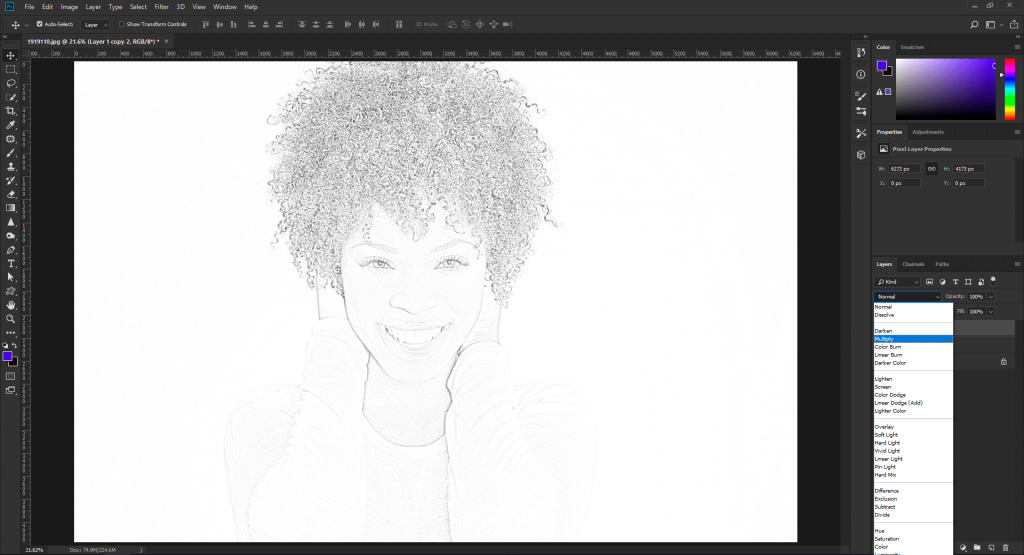
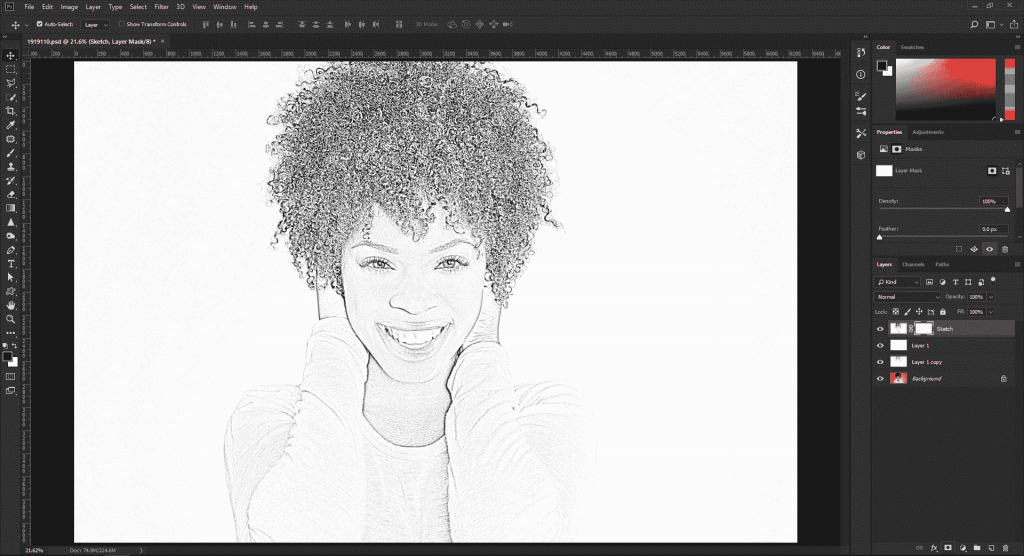
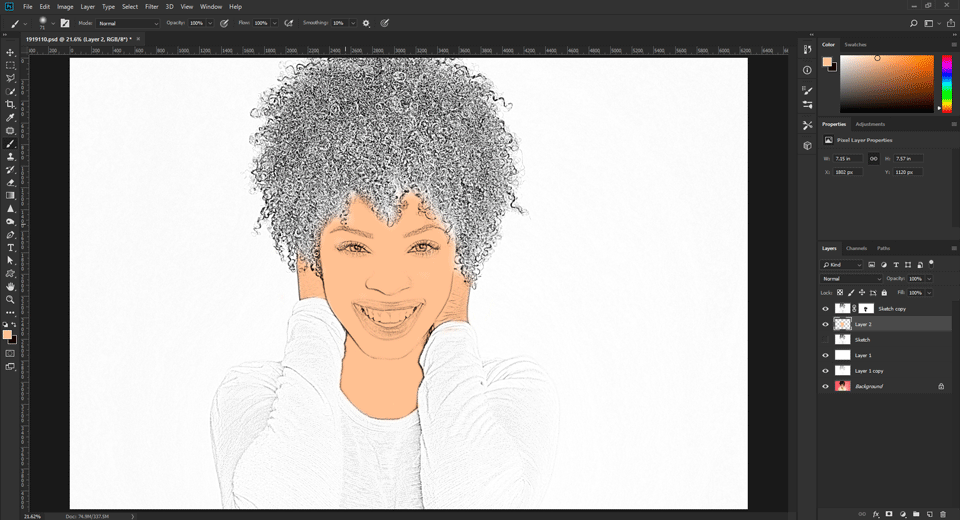
In this stage, the image might need a little cleaning up. Follow the steps to do this:
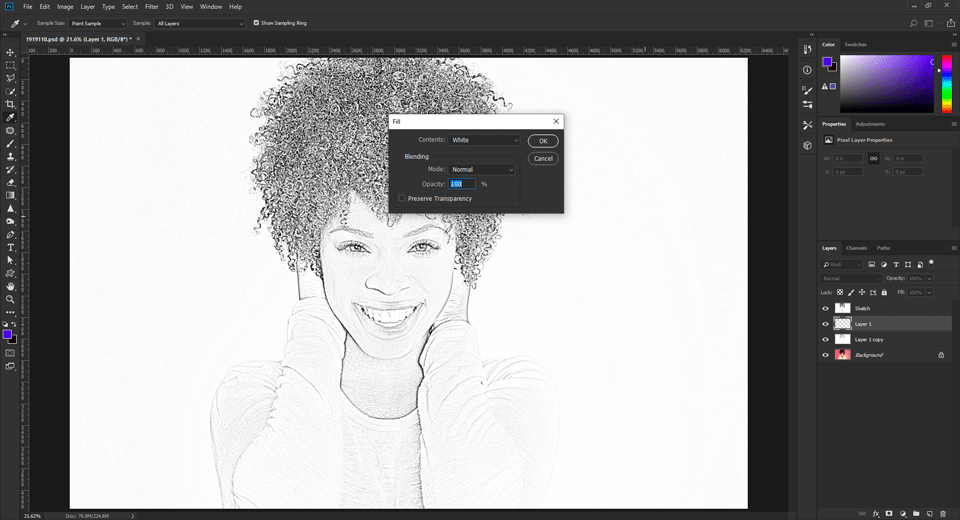

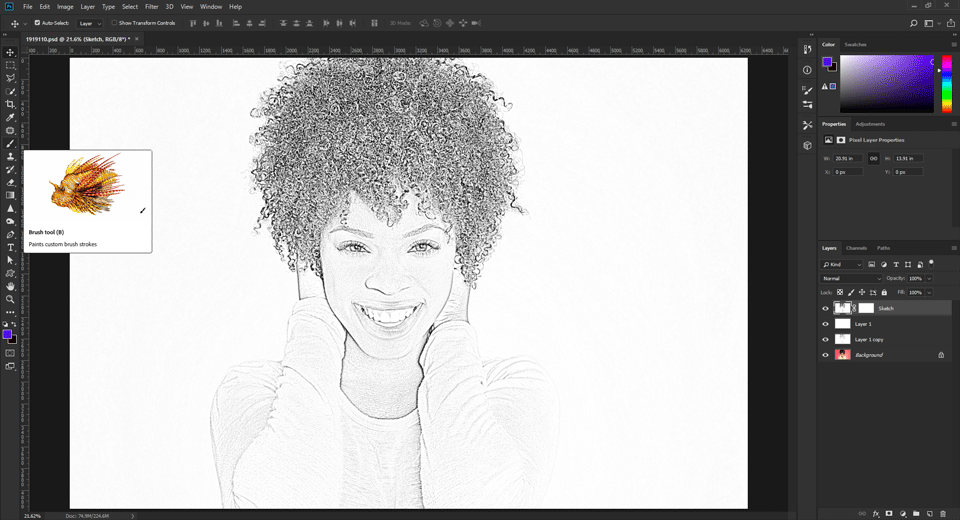
Before ending up, it’s better (if necessary) to add some color. But it comes down to your sense of taste how much you want to add. To do that:

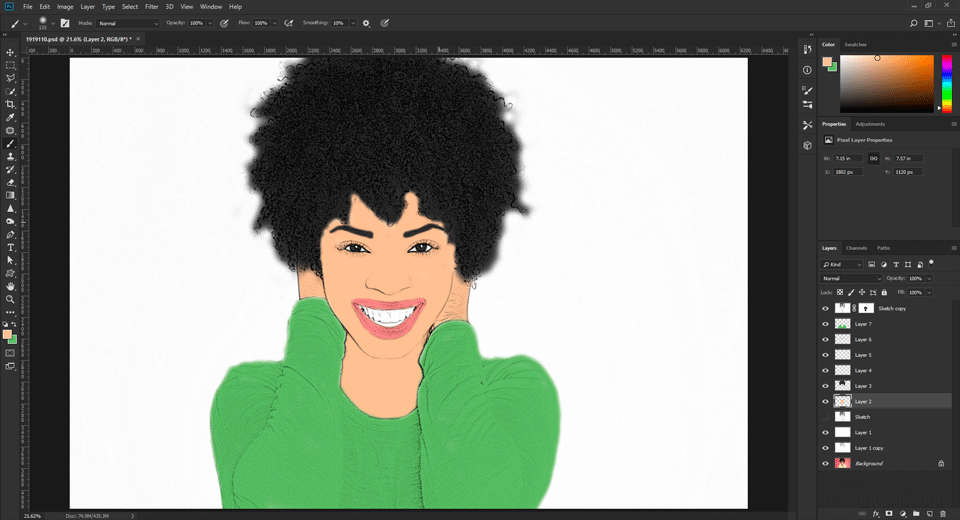
Now it’s all done!
By reading this guide from beginning to end, you will learn about making a cartoon in photoshop. You can follow this tutorial for a funny yet definite results.
There are a large number of apps which you could fairly use to convert your photos into cartoons. You can find most of them available at the Google Play Store which you can download for free.
You can use every single image and find the best one that you need. So, learn how to turn yourself into a cartoon, and make your life very much exciting. Make each of your images very special by framing them in a unique way.
TradeXcel Graphics offers professional custom cartoon art and illustration services that are tailored to meet the individual needs of their clients. They employ a team of highly trained experts that strive to cartoonize image in photoshop, photo to caricatures and graphic design services to a global market.
They are equipped with a wide range of drawing as well as design skills. This ensures that both large and small projects will be completed professionally and within standard turnaround time.
TradeXcel Graphics has the capability of making a cartoon in photoshop. Their experienced artists work directly with their clients in order to create a decipherable brand by turning vector or bitmap images into cartoons as needed for their company.
Their outstanding service for making a cartoon in photoshop is quite cost-effective. Other than that, they have the unique ability to improve the sales potential of their company’s products and other services.
TradeXcel Graphics offers brilliant design for making a cartoon in photoshop to meet a variety of different needs. Their customized graphics and vector graphic services are perfect for both businesses as well as for educational purposes.
TradeXcel Graphics has worked with many different clients from all over the world to create:
Vector graphic services offered by TradeXcel Graphics include converting digital files to vector files, converting jpeg images to vector files as well as other digitizing services.
If your business has a project related to digitizing or vector file conversion, TradeXcel Graphics can help. Their vector graphic designers and digitizers have over a decade of experience assisting businesses to expand.
These top-notch graphic designers are capable of designing various types of outputs for both print media as well as web media. TradeXcel Graphics offers extremely competitive prices, quality graphic design services, quick turnaround time and excellent customer service.
Their informative website features samples of their vector art services including raster to vector conversions, bitmap to vector conversions, jpeg to vector conversions and other vector graphic services.
TradeXcel Graphics Limited can help your company with its graphic design, digitizing, vector image conversions and image to cartoon needs. Please, contact us today for more information about our services and workflow. Why don’t you try for a Free Trial?
While taking product photos one question that all of us have is, “will my product photo look impre ...
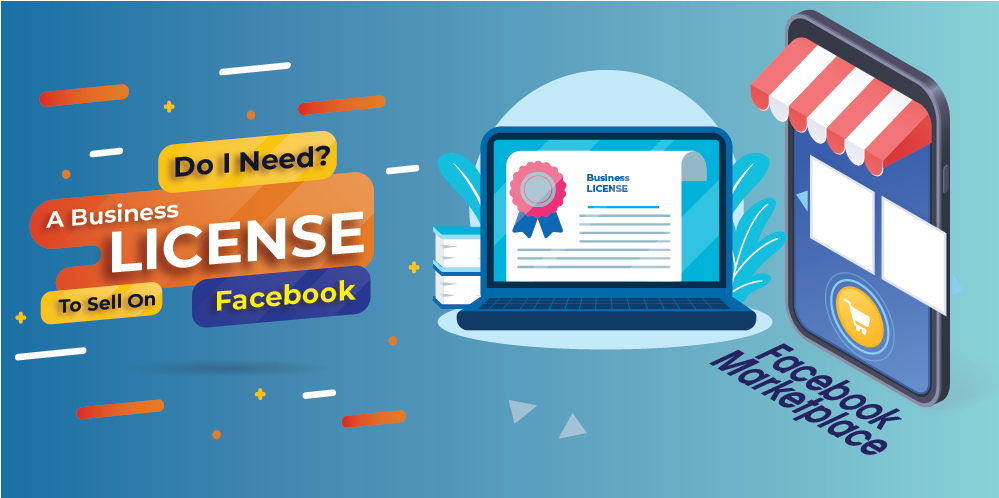
Selling items online has become the new trend and people are pursuing this version of shopping whole ...
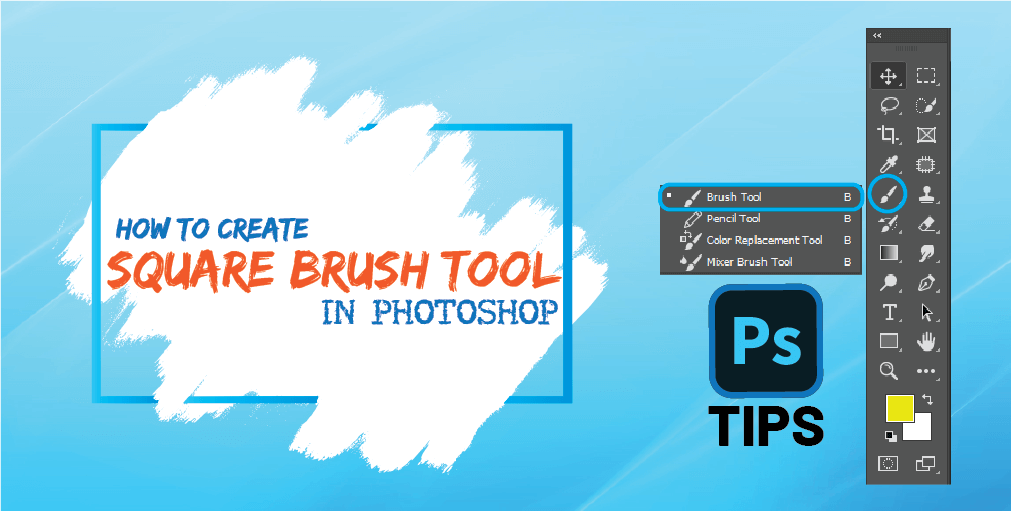
Photoshop brush tool comes in handy when you require painting on any document. Photoshop has plenty ...

Images that we see normally are called raster images. What is a raster image? Raster images are cons ...