How to Sell Online Without SSN? No SSN, No Problem!
As a minor or a temporary resident, it could be difficult to sell online without a Social Security N ...
If you are an eCommerce merchant and off to launch your own apparel product photography studio but finding it difficult then this editorial fits perfectly to your research list.
Knowing how to photograph clothing for your eCommerce store perfectly will win you half of the battle and the rest is implementing what you learn from here. A great eCommerce product listing with amazing product photos is the difference between closing a deal or losing it.
To reduce the bouncing rate of your potential consumer you have to present eye-pleasing and impressive product photos on your online store.
In this editorials, you will see a detailed step by step apparel product photography guide for eCommerce stores.
Photographing clothing products for eCommerce stores must be done perfectly accurately if you want to increase your sale. Apparel product photography is not as hard as jewellery photography but still, doing it perfectly is always a challenge for the beginners. See the step by step apparel photography tips to achieve perfection.
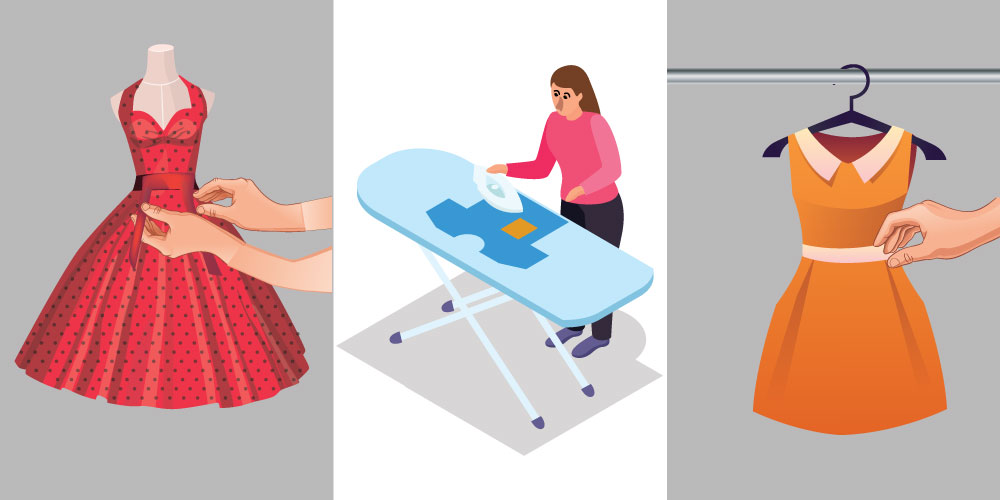
Preparing the clothing product is the first step of apparel product photography if you want amazing photos of your products. If you prepare your products and shoot them at the beginning, the post-processing will work and will give you less headache.
When you shoot your clothing product, you try to keep every detail intact and visible. So if you don’t prepare your cloth they may ruin your images and can lead you to reshoot them again.
So what are the preparations we are talking about here?
Wrinkles
It’s the most common and normal flaw for clothing products. Wrinkles are the most visible thing in a cloth while photo shooting it. So while preparing clothes for shooting the first job is to remove wrinkles from the clothes. Iron or steam your cloth before putting it on models or mannequins.
Orientation and Spots
The orientation of your clothes needs to be perfectly aligned or it will distract customers’ visuals. Fold the sleeves accurately and consistently all the way. Take a good look and see if your product has any stains or not because if it does, the high-quality photos will highlight that also. Look carefully and avoid stains and orientation.
Take Care of Small Details
Last but equally important is to take a good look at small details like whether buttons are accurately up or not and ties are well styled or not if any used.
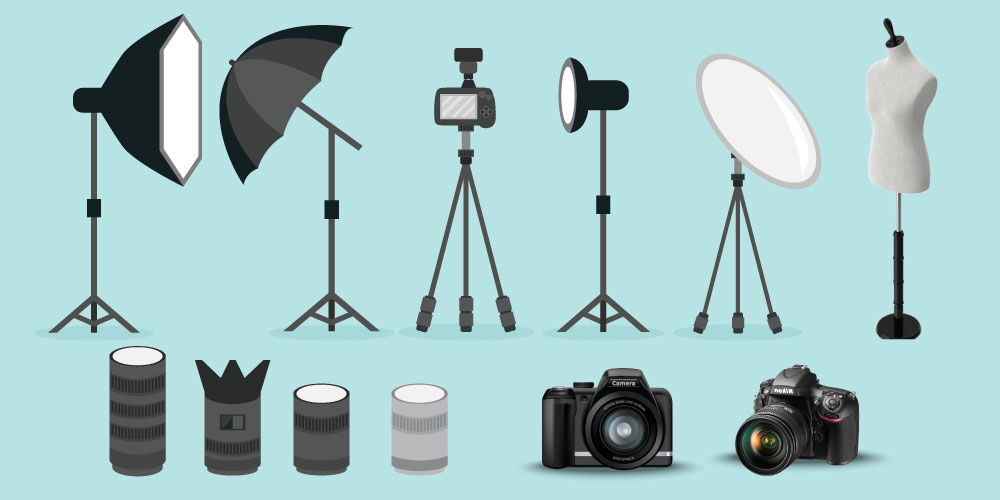
Now that the clothes are perfectly prepared it’s time to get ready all the photography equipment that you need to use for shooting. The gears for apparel photography are almost the same as normal product photography except few.
Below I have listed apparel product photography equipment that you will need:
Tripod
When you are shooting a clothing product, a steady hand is a must and using a tripod will help to ensure that. Tripod is one of the closest equipment that will attach with your camera and that’s why always look for a sturdy one. Without a tripod image can come out blurry and unwanted shakiness can cause that blurriness.
The only solution to this is using a tripod but the tripod will hold your camera and make sure to buy a sturdy one.
Lighting
Proper photography lighting helps photographers to capture every detail of the subject and buyers love to see highly detailed product images. As an apparel product photographer, one must have the necessary photography lighting kit.
To cover all the angles of the subject with proper lighting use three point lighting setup in the studio. One is the key light which will act as the main light to your shoot and the other two is fill light and backlight.
If you are planning to do your product photography using a smartphone then a professional studio lighting setup won’t work for you well. You should use a continuous lighting kit because professional photography lighting is synced with the DSLR camera shutter.
Background
For apparel product photography background is important but not selecting a suitable background is not as easy as it seems. Use a photography background kit to get the best result. Whatever backdrop you use it should complement your foreground which is the subject.
The best backdrop for product photography is a solid color. Most of the online stores have one common product image requirement which is a solid white background so that the product gets more visible. So always use a solid color backdrop for your apparel product photography.
Camera
Choosing a camera for product photography will ensure the quality of photos and capability capturing detail in the photo. It is true that the more expensive a camera you buy the better image you get but you can get a decent product image using a mid-budget or budget DSLR camera as well.
You can also use a smartphone for your product photography because the image capturing capabilities of smartphone cameras are revolutionary in recent days. If you are planning to buy a DSLR camera then the best option for your product photography would be buying a mirrorless camera.
Models or Mannequin
Last but not least model or mannequin to wear and pose with your clothing product. No matter how good your product is, bringing them in front of the consumer in the correct way will decide it’s fate. With models, your photo shooting will be more flexible as models can adjust with the clothing and strike any pose you want.
On the other hand, if you use mannequins they are just a doll standing on a surface. You have to stick your clothes to make them fit and will give you a limited number of poses. The uses and the possibilities of doing different things are what make these two things useful for clothing product photography.
Model photography is more expensive than mannequins but with the mannequin, you will face less hassle.
Setting up the studio for product photography is also as important as preparing the product. You don’t need to have big rooms or flats to set up a photography studio. If you have a spare area at the back of your store it would do the trick for you also.
To set up an ideal product photography studio you have to ensure major three photography equipment. One is Backdrop, Photography Lighting, and The Camera. I already talked about these things above from there you will get an idea,
Setting up the lighting
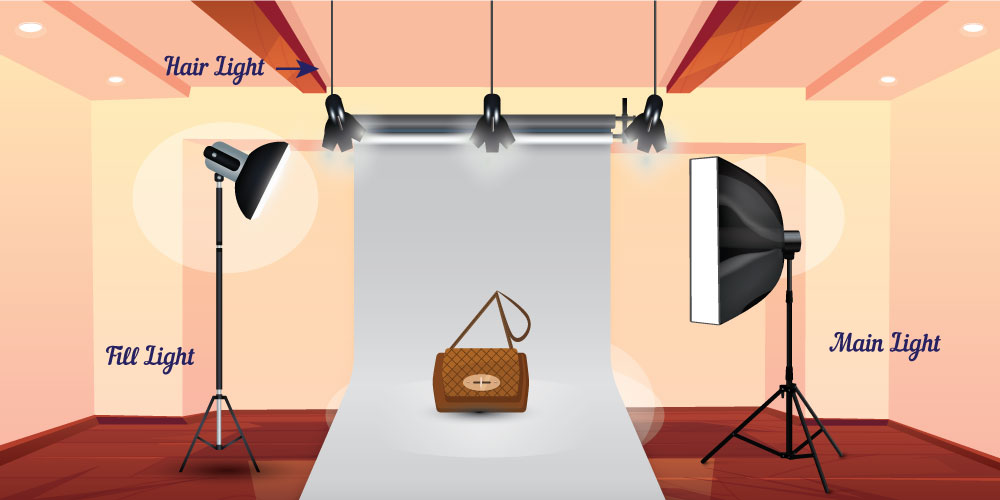
Now let’s talk about how you can set these up and make a complete product photography studio. The first thing to set is the background. For product photography, the backdrop should be in a solid color. Almost all the renowned eCommerce stores such as Amazon, eBay, Walmart, Etsy have product image requirements of a solid white backdrop for their product listing.
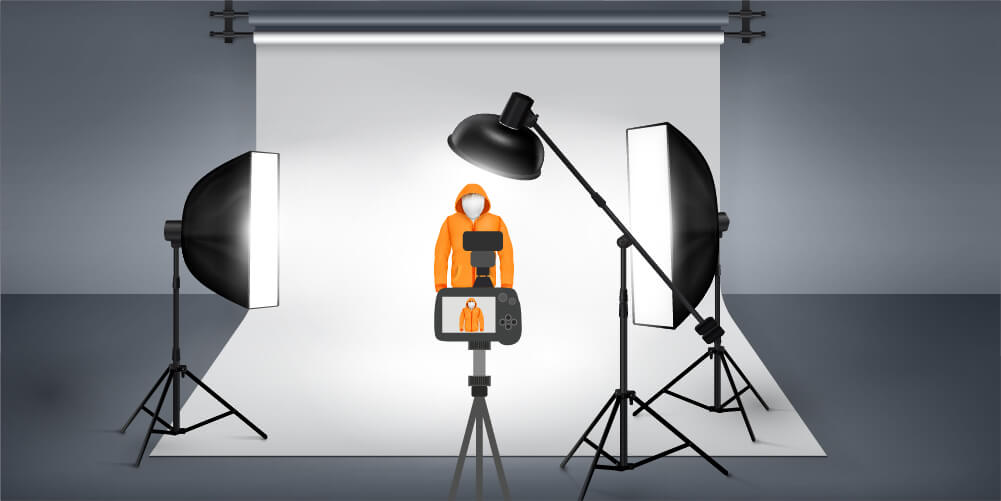
After the backdrop is done it’s time to install lighting. For lighting, I have mentioned three major photography lighting equipment. Now see the below image where you will get an idea about the setup of the photography lighting and also read forward where I am going to elaborate the lighting setup.
I have mentioned about three major lightings one is the “Key Light” and like the image set the key light next to your camera and face it towards the model or mannequin whatever you are using.
Check out our detailed article on Softbox For Product Photography to know more about product photography lighting setup.
Set the second light at a 45-degree angle from your subject because this light will act as a fill light. Don’t keep the fill light near the key light because if you do your lighting will get imbalanced.
The last one is background light or hair light. This will stay right between your backdrop and your model or mannequin.
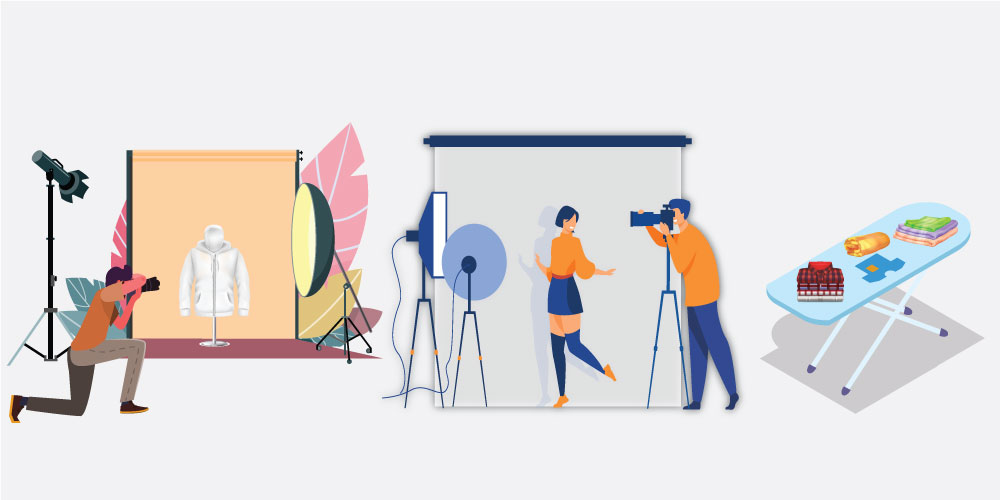
You can shoot apparel products in multiple ways. Some of them are expensive but premium, some of them are affordable and decently presentable. Based on your scenario and platform where you will publish the photo you can shoot clothing products in three major different ways.
Before you start shooting consider the platform where the images will go and the types of necessity or requirements you have for your clothing product photo. You can use models, mannequins, or flat surfaces like tables to shoot apparel products.
Use a Model
Using models for product photoshoots is a common way to go for brands like Puma, Adidas, CK, JCPenny, and many more. Models are expensive so if you have the budget you can hire models to do the photoshoot for you. What’re the advantages of hiring models?
Well, models can wear the product and blend themselves in it easily so that you don’t need to use props to make them fit. They can offer you any pose you want and look awesome with your product. Models provide a realistic look at your product photo which customers love to see.
You can reuse the model photos for your clothing photography in the image post-processing.
Models also offer individuality to the products and create a brand further. For example, often online shops prefer models that reflect their ‘target customer’ They believe. The designers, the clothing, and the vibes couldn’t be more different.
The disadvantages of hiring models are not only that they are expensive but also hard to match the schedule with them.
Use a Mannequin
Mannequins are mostly used as a replacement for models for low budget retailers but this doesn’t mean that the photos with mannequins are less attractive or fails to impress consumers. Not only for budget shortage retailers sometimes use mannequins for the requirements also.
Such as most of the eCommerce stores demand multiple product images from different angles to get a detailed view of the product. To get a detailed view from every angle, close shots are important, and using a mannequin allows you to get the perfect shots here.
Sometimes the final image does not carry the mannequin. In the post processing experts remove the mannequin and give the image a hollow look. The process is called ghost mannequin effect or neck joint effect service.
Flat Lay Photography
This clothing photography style is becoming popular nowadays. From social media to online stores flat lay photos of clothes are everywhere. It costs way less than the other two but the reason for it being so popular is consumers get a new view of the product with this style.
To do flat lay photography you only need a bright corner and a table or white surface to lay down your product freely. Flat lay photography works great for jackets, t-shirts, shirts and it works with socks and men’s suits also. I will not typically consider using an e-commerce layout if you do not need a picture for social media to post. I assume that it is of much more benefit to the consumers when it comes to product pictures.
Today retailers have to show their product photos to consumers in every possible way. It’s not for the sake of the image requirements but for the retailer’s own good. So flat lay photography can also be an option that you can consider for your clothing photography.
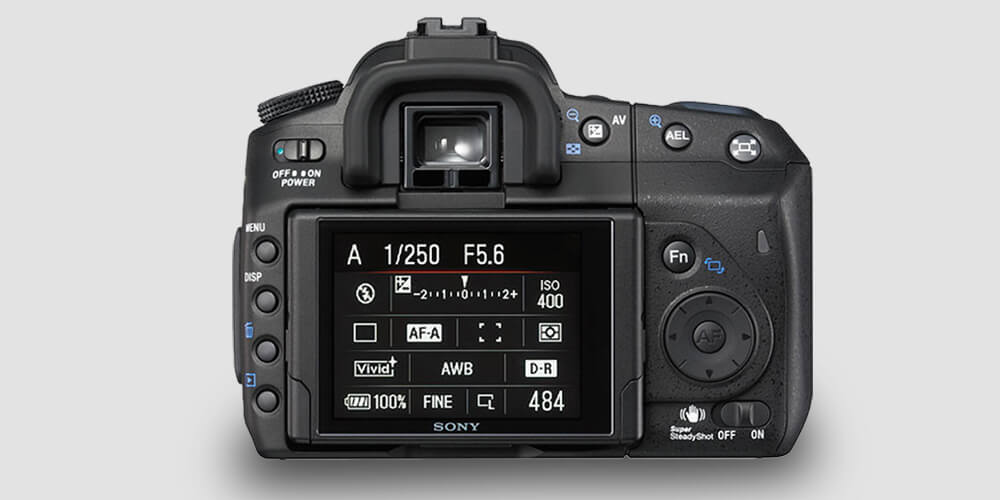
If you followed the steps till now you will have a proper product photography setup and a camera to start shooting products on models or mannequins. For product photography, camera settings are different from others and so get your camera setting right from the first go. Let’s see what I use in my photo shooting.
Aperture Settings
As for clothing product photography, detailing is the key to impress consumers and to get detailed and vibrant photos using higher aperture settings in your camera. You can keep your aperture between f/8 to f/12 but if your product photography theme requires more or less you can go with that also.
Shutter Speed Settings
Shutter speed decides how much light your photo will capture as the longer the shutter remains open the lighter your photo will get. Lights help to capture detail and apparel product photos need to have detail to impress customers. I keep my shutter speed between 1/125 to 1/250 for apparel products.
ISO Sensitivity Settings
The ISO setting will be different depending on the lighting conditions of your photography setup. For indoor artificial lighting, I would recommend you to set your ISO between 400 to 800.
It’s time to do some action. Yes, if you are reading till now then I assume you have followed the steps I mentioned and decided how you want to do your photoshoot for your clothing product to sell online.
Ensure your camera is stable. Use a tripod because it will keep your camera still and allows you to shoot clear and sharper pictures of the commodity. Position your camera on a safe or flat surface if you don’t have a tripod.
To make your apparel product photos more effective you can consider a few photography tricks that I am going to share with you guys below.
Get an Effective Framing
Framing your model or mannequin for product photoshoot is inevitable and the result of your product photos mostly depends on framing. For product photos, close shots are more preferable on eCommerce platforms.
Capture product photos with 80% off space taken by the product.
Use optical zoom instead of digital zoom because digital zoom reduces the image quality and gives you low quality image.
Use a timer while photographing any product or else the focus won’t be on point and your image will look grainy and noisy.
Mark the Spot
If you are working with models or mannequins then this is an important thing to look for.
With mannequins and models, you have to mark the spot where you get the perfect shot once or whenever your models or mannequins are moved from the spot it would be very difficult to find that again.
Especially, when you work with mannequins you need to move your mannequin multiple times to change the clothes orientation and at that moment if you don’t mark the spot, you may lose it and you will need to waste some of your time again to find that.
So always mark the spot where you get the best output for your product photos.
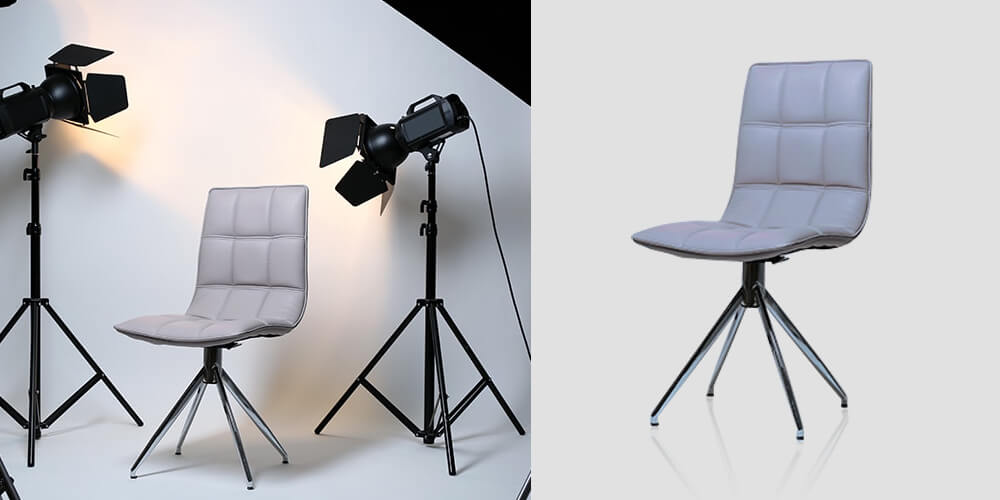
Now after finishing the photoshoot, you may think that after doing all of the things accurately from the start your work is finished but wait, in this stage if you slow down then your product photos will fall short of being perfect.
Post-processing your product photos is vital to increase your sales. So whenever you go for an image editing service for your product photos look for professional agencies because apparel product photos need extra care to perform to their fullest.
If you are using mannequins then you can’t upload your product photos with the mannequin in it. You have to remove the mannequin and give your product a hollow look into it to look impressive.
The ghost mannequin effect service can provide you with the hollow effect where photoshop experts combine neck joint service, sleeve joint service and bottom joint service to make it look 3D style.
Other than invisible mannequin service your product photos will also require a liquify effect for removing the wrinkles and setting the orientations right.
Check out our detailed article on Reuse Model Shoots With Ghost Mannequin to know more about how to increase sales by reuse ghost mannequin
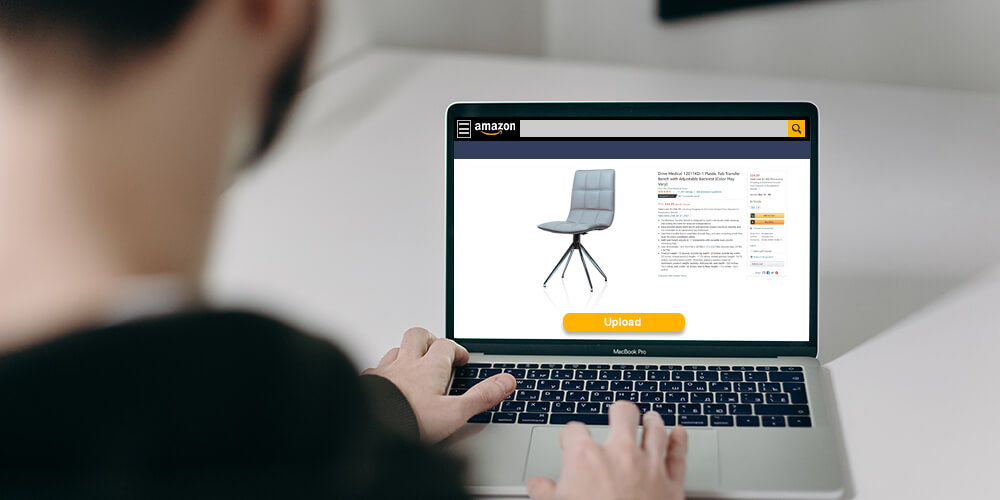
We have come to the last step of how to photograph clothing for your eCommerce store and in this step, I will talk about the last but not least step which is uploading product photos to sell online.
After capturing product photos and editing them all you need to do is upload them to your online store and sell them. Before you upload your product photos make sure you follow all the image guidelines of the online store.
Also, optimize your photos according to the SEO requirements of that eCommerce platform. Some of the compulsory SEO optimization for online stores are setting up the image file name, Alt text, and image descriptions as well.
Try to cover all the terms and conditions for product listing on online stores and you will get positive results.