How to Sell Online Without SSN? No SSN, No Problem!
As a minor or a temporary resident, it could be difficult to sell online without a Social Security N ...
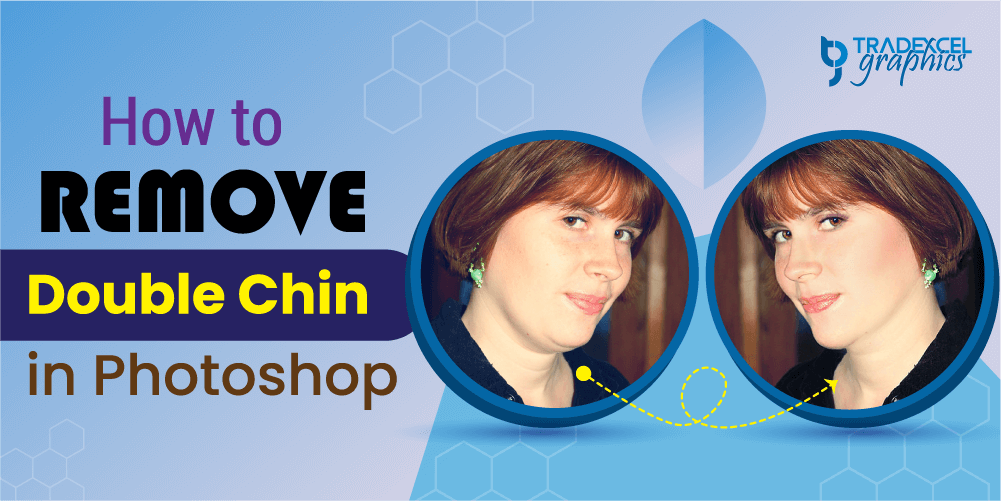
You might have photos containing people with a double chin as a portrait photographer. This is why learning how to remove double chin in Photoshop is necessary. With a few steps in Photoshop, you could fix the portion of the chin in Photoshop. Right in the article, we have explained each process in great detail.
You only need a brief introduction to Photoshop to follow the mentioning process. Afterward, learning each step would be simple and fast. Even as a portrait photographer, it would help you impress your clients with polished images. Shall we start the tutorial?
Removing the chin can seem hard to get onto. Because it’s located in a tricky place and removing it within Photoshop takes a lot of skill to acquire. Nonetheless, you could follow the below-mentioned steps to remove the double chin in Photoshop. So let’s get into each of the steps to remove the double chin within a few minutes.
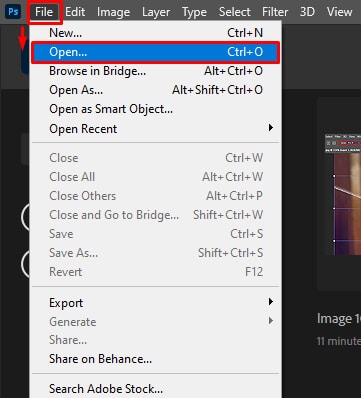
Step 1: Import or open your image into the Photoshop interface to edit.
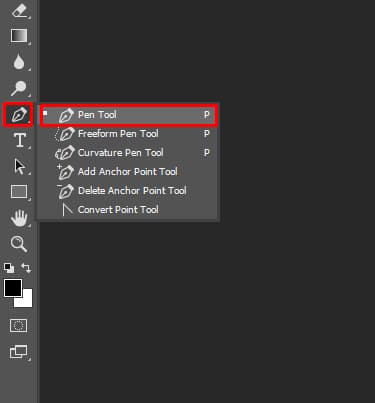
Step 2: Afterward, click on the pen tool to start creating shapes.
Step 3: Start creating a path along the chin in Photoshop once you get outside the chin area, click outside the artboard and go around the image and click on the starting point. It would create a complete pen tool path.
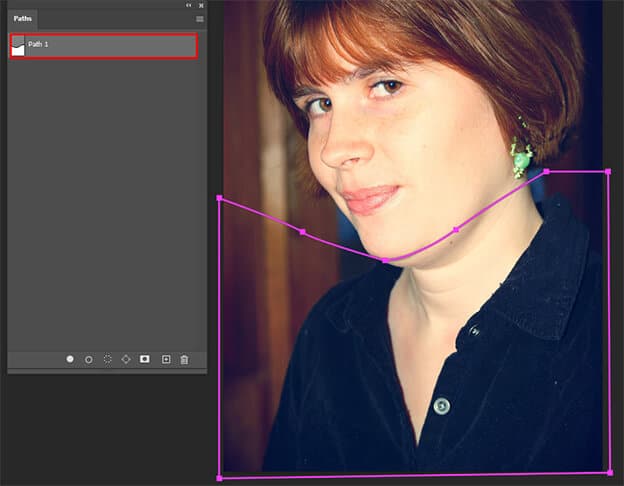
Step 4: Go to Windows > Path. It will show you the path you have created. You could rename it right away.
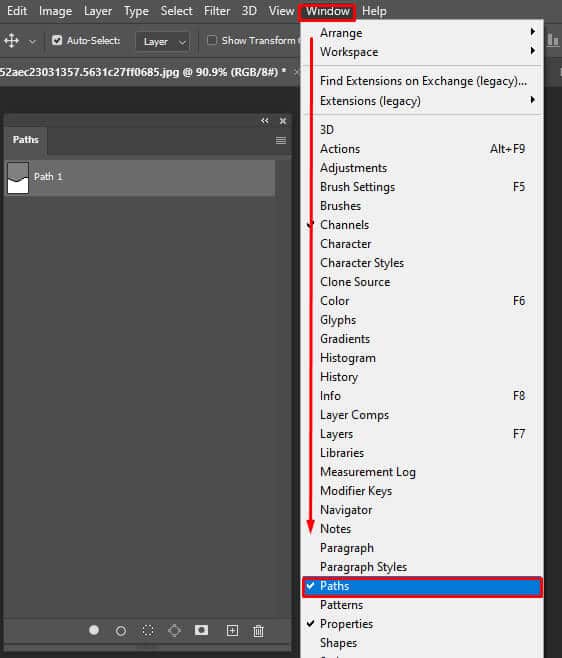
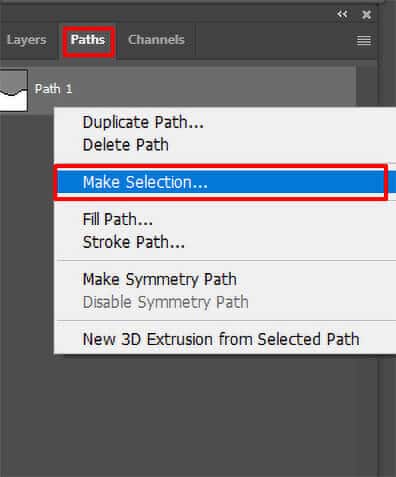
Step 5: Now right click on the path and click on “Make Selection”.
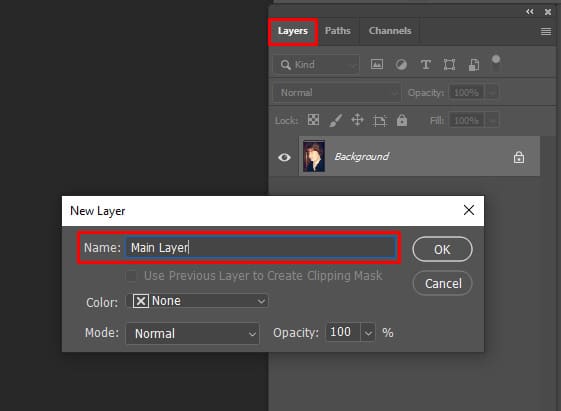
Step 6: Afterward, Go into the layers panel(Windows > Layers), double click on the background layer. Rename the layer and click on the “Ok” button.
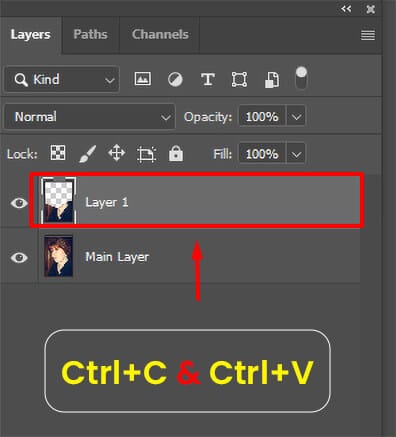
Step 7: Now press Ctrl + C and afterward Ctrl + V, to transfer the new selection to the new layer.
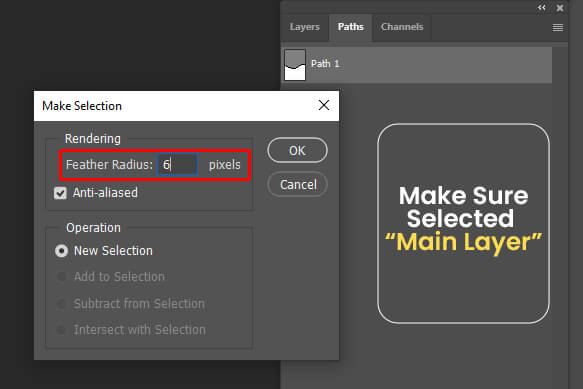
Step 8: Make sure to select the main layer. Again select the path you have created with Windows > Path. Right click on it and select “Make Selection”.Then enter Feather Radius as your requirement. But in general, “6” Feather Radius would be enough for most images.
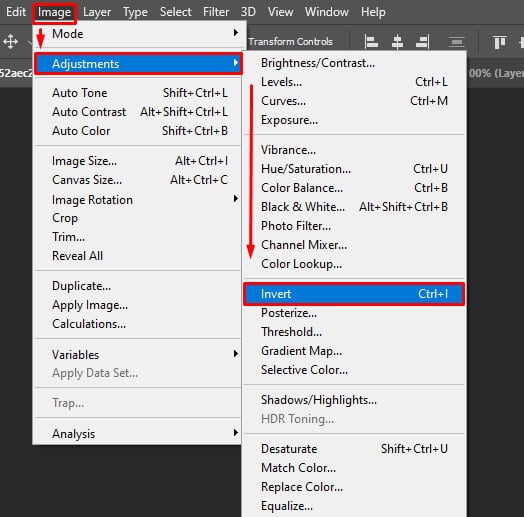
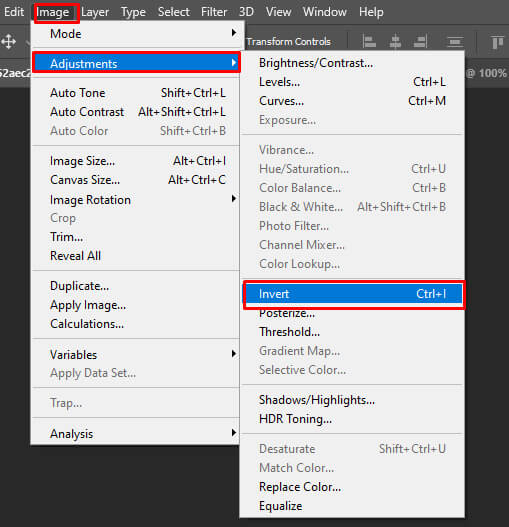
Step 9: Now go into the Image > Adjustment > Inverte. Or press Ctrl + I on the keyboard to invert the selection. Then press Ctrl + C and then Ctrl + V to paste the selection on a new layer.
Note: Drag the layer with the upper area to the topmost position and place the layer with the lower part underneath that.
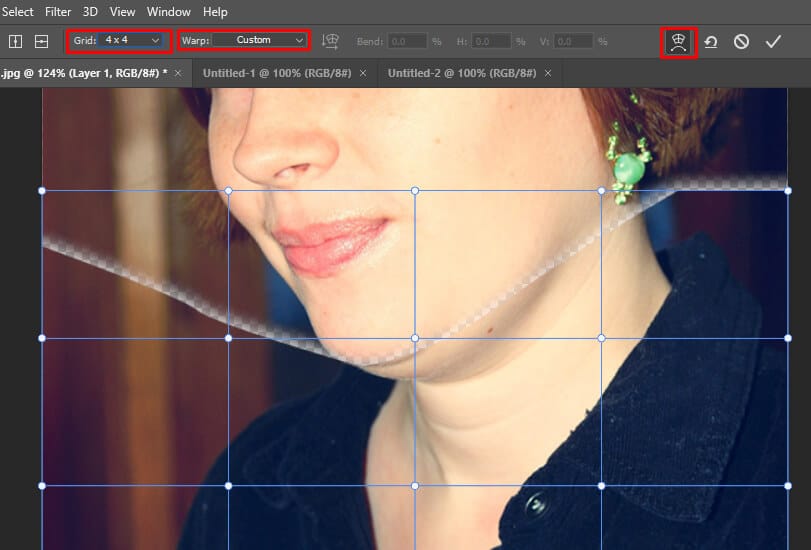
Step 10: Now select the layer with the lower part of the chin. Press Ctrl + T and right click and select the “Wrap” option. Select the 4×4 grid from the top bar. Afterward, use the mouse to hide the double chin underneath the top layer. Once done press “Enter”.
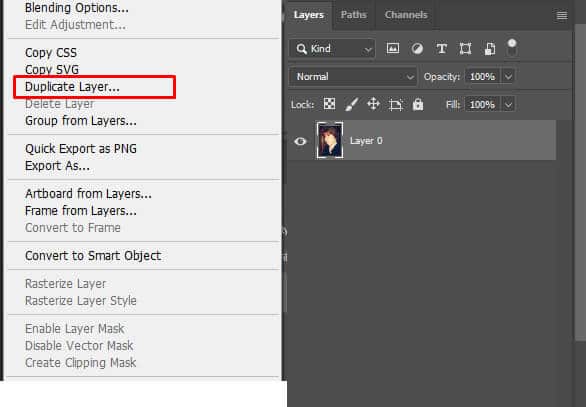
Step 1: Once the image is open in Photoshop, unlock the background image layer with Alt + clicking on the lock icon. Afterward, create a duplicate layer from the layers panel by right-clicking on the layer and selecting the “Duplicate Layer” option.
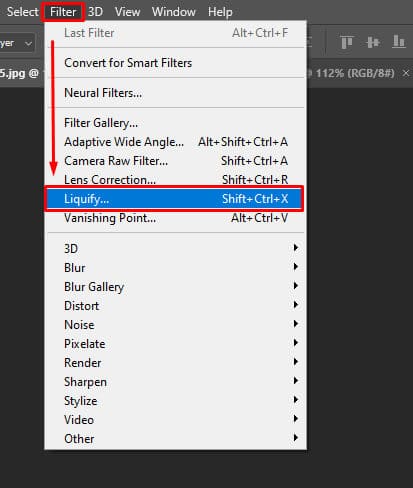
Step 2: Afterwards, go into the Filter > Liquify option to edit your images on Photoshop. On the other hand, you could use the shortcut Shift + Ctrl + X to get the same functionality.
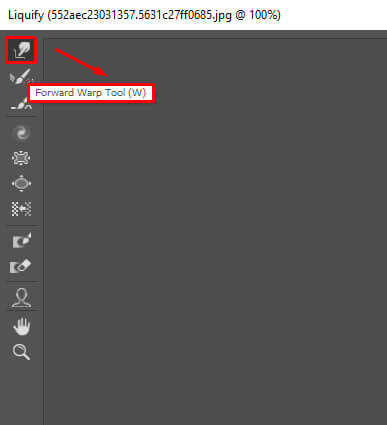
Step 3: Right now, you need to select the “Forward Warp” tool from the new window. Or you could press “W” on the keyboard to activate it a lot faster.
Step 4: After you activate the “Forward Warp” tool, it’s time to adjust the settings at the interface’s right. You could alter the pressure, density, and rate parameters at the following interface. Before you start liquifying your images, make sure to adjust the parameters as well.
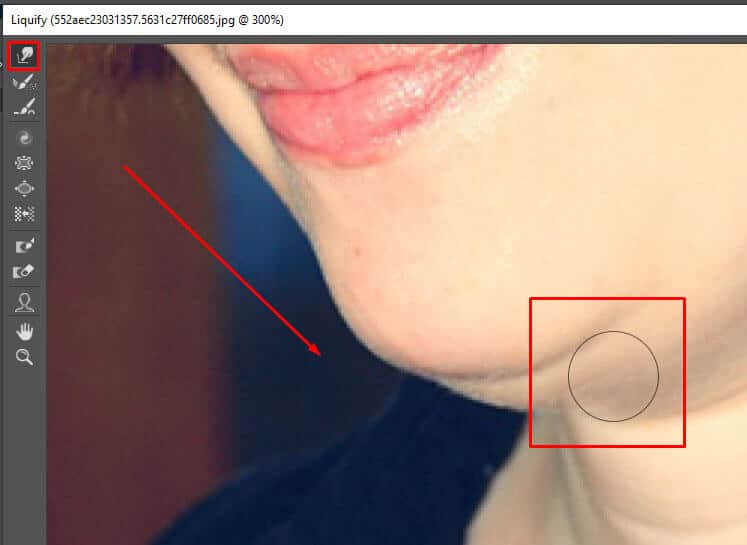
Note:
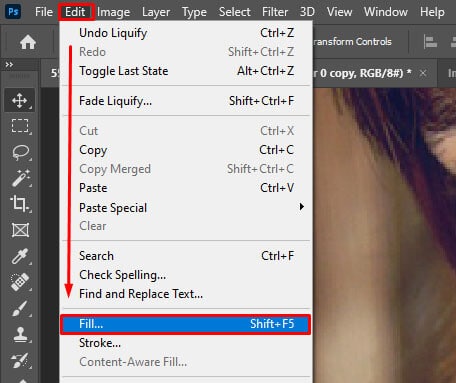
Step 5: Right now, we need to work with the layers and noise to create a texture that makes the Image look better. Go into the Edit menu > Fill option from Photoshop. It would create a new layer with a gray thumbnail.
Step 6: Go into the Filter menu > Noise > Add Noise option to apply Filter into the Image. Now adjust the “Amount” field percentage to your likings. Make sure to check in the Preview option to verify real-time changes of the noise filter.
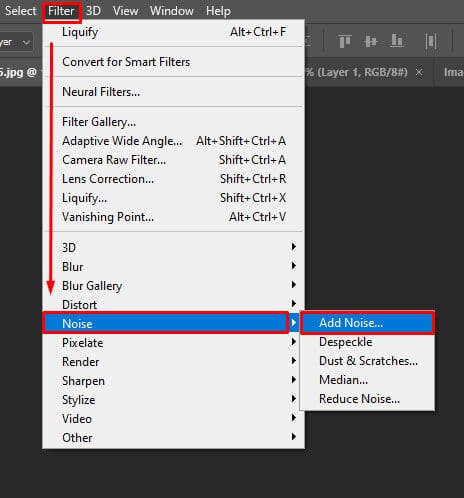
Step 7: Now it’s time to add gaussian blur into the image to make the image effects smoother. To do so, you need to get into the Filter > Blur > Gaussian Blur within the Photoshop interface.
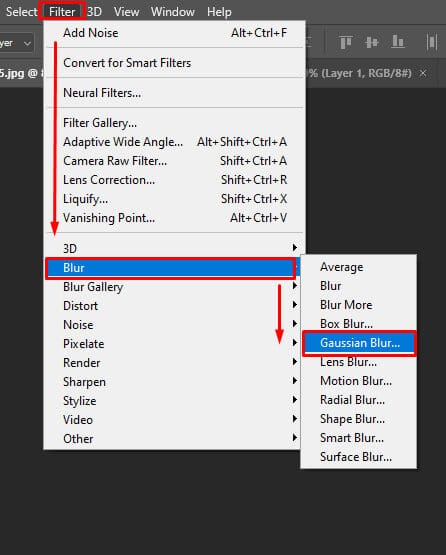
Step 8: Afterward, insert the radius at the Gaussian blur window. The more you increase the radius value, the higher it would apply blur effects as a rule of thumb, so you need to choose the numbers depending on how it looks on the Image.
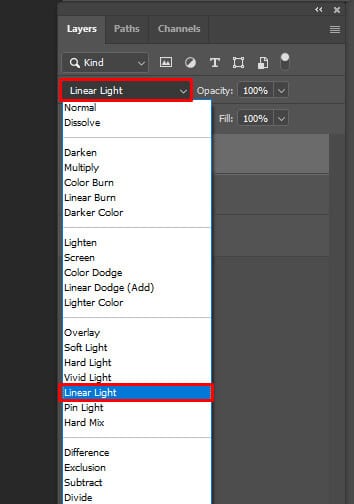
Step 9: Change the layer mode of the following layer to “Linear Light”.
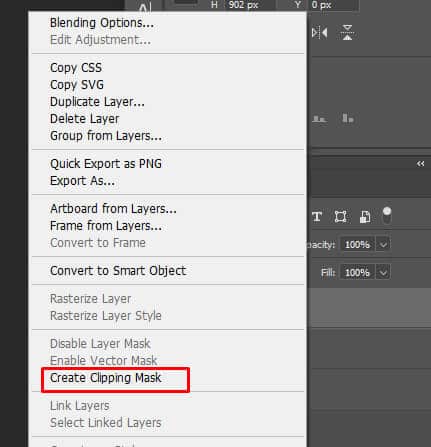
Step 10: Now, right, click on the layer and select “Create Clipping Mask”.
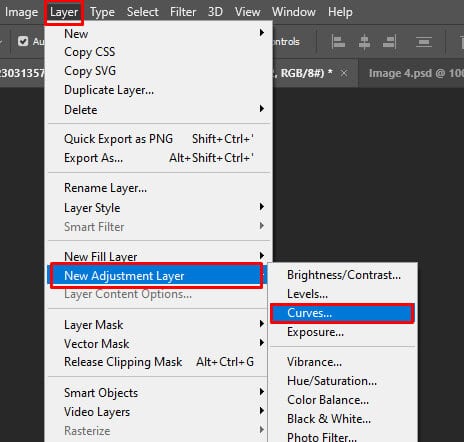
Step 11: You need to apply an adjustment layer to your Image at the following step. Navigate into the Layers > New Adjustment Layer > Curves to apply the adjustment layer option. An adjustment layer curve would open up. Look, close to the line, click on the point you want to control. Afterward, drag the point downward to apply shadow to the following color range.
Step 12: You need to apply a layer mask to the mentioned layer. Once you apply the layer mask, go into the Image> Adjustments > Invert. It would make the preview of the masking thumbnail completely black.
Step 13: At the following step, you need to start creating shadows around the chin of your model. If you have made any mistake, just swipe the brush foreground color to black and brush over the mistaken area.
View More: Remove Shadows from Photos in Photoshop
Step 14: Right now, you need to create a new adjustment layer in Photoshop. But at this time, create a point on the adjustment curve and drag it upward.
The following step would mark the end of the double chin removal process of Photoshop. At the final picture of the tutorial, you would have a great-looking picture. Further, the double chin would vanish, and the photo would be a lot smoother.
Let’s get into the questions for removing double chin in Photoshop. Let’s get into it right now.
You could use the “forward wrap” to make anyone skinny. However, it means you have to go into the Filter> Liquify option in Photoshop. Afterward, press “W” on the keyboard or click on the top left icon on the new interface. Adjust the forward warp tool afterward, start clicking and dragging inwards from the edge of your photograph models.
Among all of the apps, Photoshop ranks the top. Because it offers you many facilities for removing chin, for example, you could use the liquify feature, stamp tool, and others. We would suggest you use Photoshop to remove your chin. It’s better to note; Photoshop needs Windows and Mac devices to run.
You could use a stamp tool on Photoshop to remove the double chin. But you need to take samples from a perfect place. Once you find the perfect sample area, you could start stamping the sampling area into the chin area.
Learning how to remove double chin in Photoshop is useful for any user. It’s indeed a great technique to follow as you could vanish the chin within a few clicks. Further, Photoshop offers great options to remove your mistakes as well. Overall, it’s a great toolkit to have for photo editing jobs.
Either way, whenever you start editing photos, make sure to have a proper guideline at hand. It would make sure that you don’t go the wrong way. In fact, with our mentioned tutorial, you could achieve proper results within a few minutes. So, check it out right now.